Snowflake Integration User Guide
Technical Documentation and Implementation Guide
Overview
This document provides comprehensive guidance for integrating Snowflake with the StreamSpace platform. The integration enables seamless data operations between your Snowflake instance and StreamSpace workflows, allowing for sophisticated data processing and analytics capabilities.
Prerequisites
Before beginning the integration process, ensure you have:
- An active Snowflake account
- Administrative access to StreamSpace platform
- Necessary permissions to create integrations
- Required Snowflake account credentials and configuration details
Authentication Methods
The integration supports database connection authentication with the following required parameters:
- Account name
- Database name
- Warehouse details
- Username and password
- Schema information
- Role configuration
Connection Parameters
- Account Name: The unique identifier in your Snowflake URL (format:
xxx.region.snowflakecomputing.com) - Database: Target database name for the connection
- Warehouse: Virtual warehouse for query execution and data operations
- Username: Authorized Snowflake user credentials
- Schema: Target schema for data operations
- Role: Security role for connection permissions
- Client Session Keep Alive: Optional setting for maintaining persistent connections
Integration Setup
Step 1: Accessing Integration Configuration
Navigate to the StreamSpace platform's integration section to view existing Snowflake integrations. The dashboard displays all configured Snowflake accounts and their details.
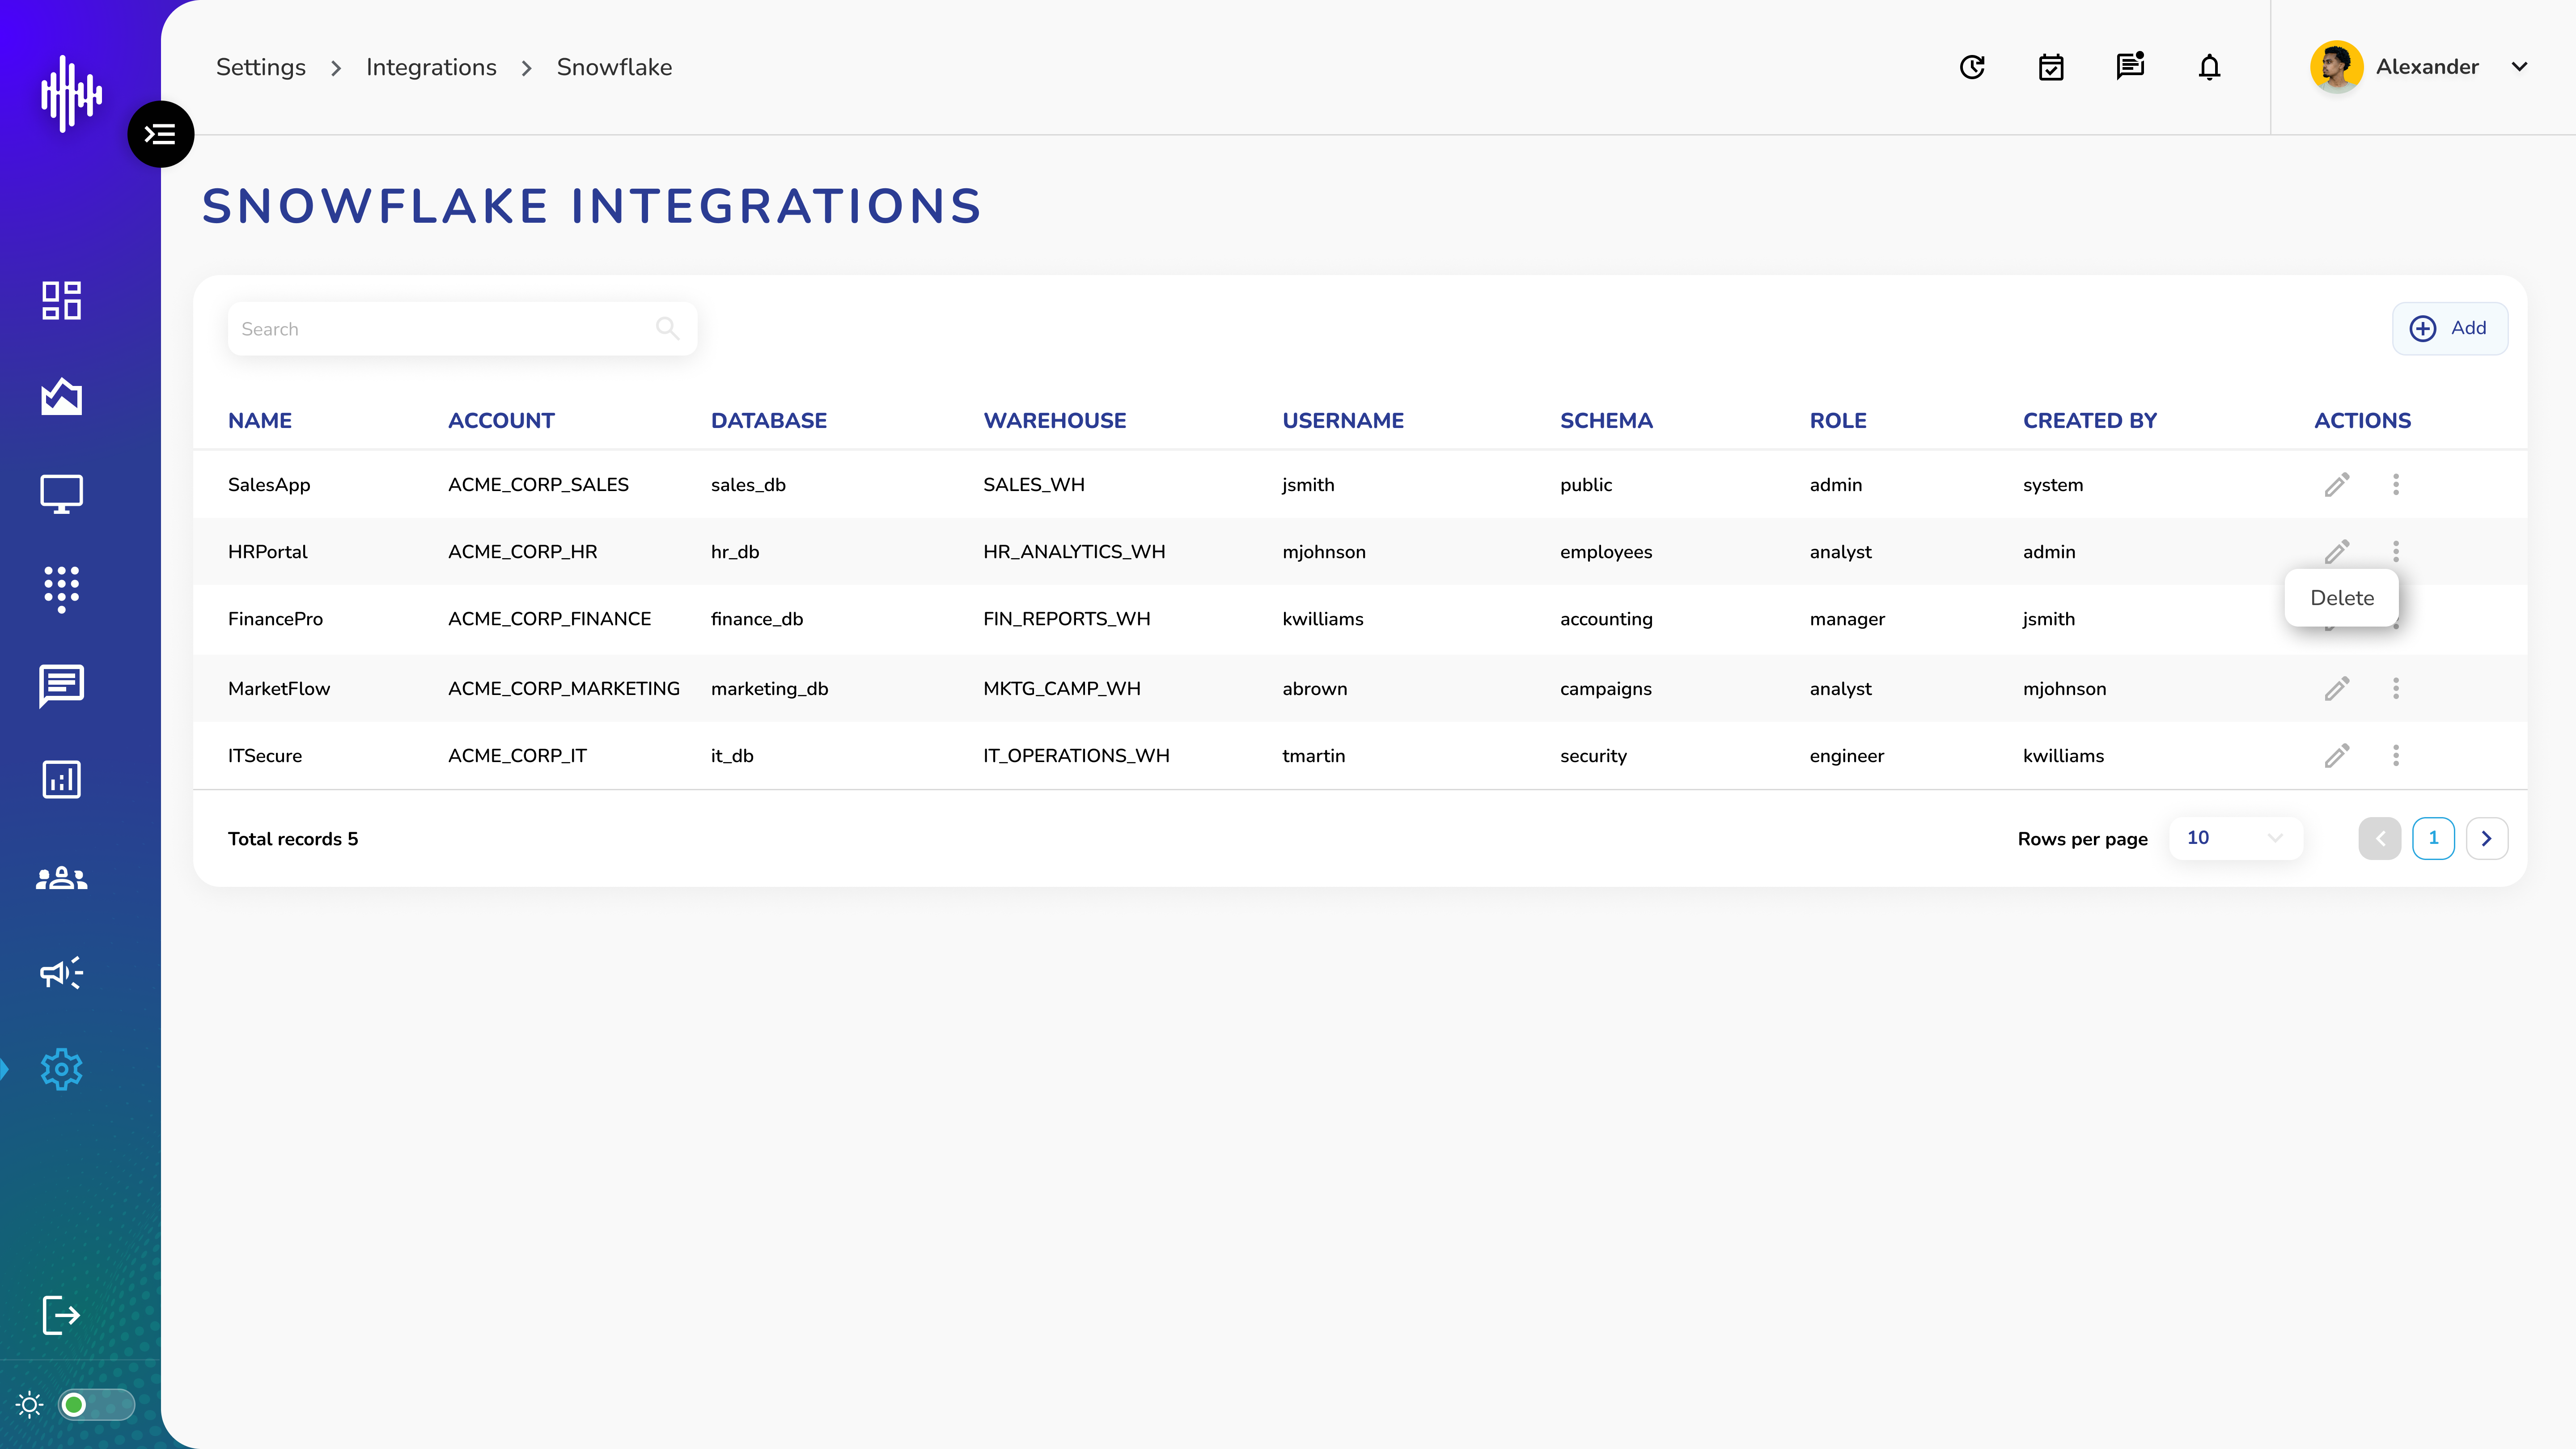 Figure 1: Snowflake Integrations Dashboard showing existing integrations
Step 2: Creating New Integration
- Click the "+ Add" button in the Snowflake Integrations interface
- In the configuration form, complete the following required fields:
- Name (Integration identifier)
- Account details
- Database configuration
- Warehouse selection
- Username
- Password
- Schema definition
- Role assignment
- Configure optional settings such as Client Session Keep Alive
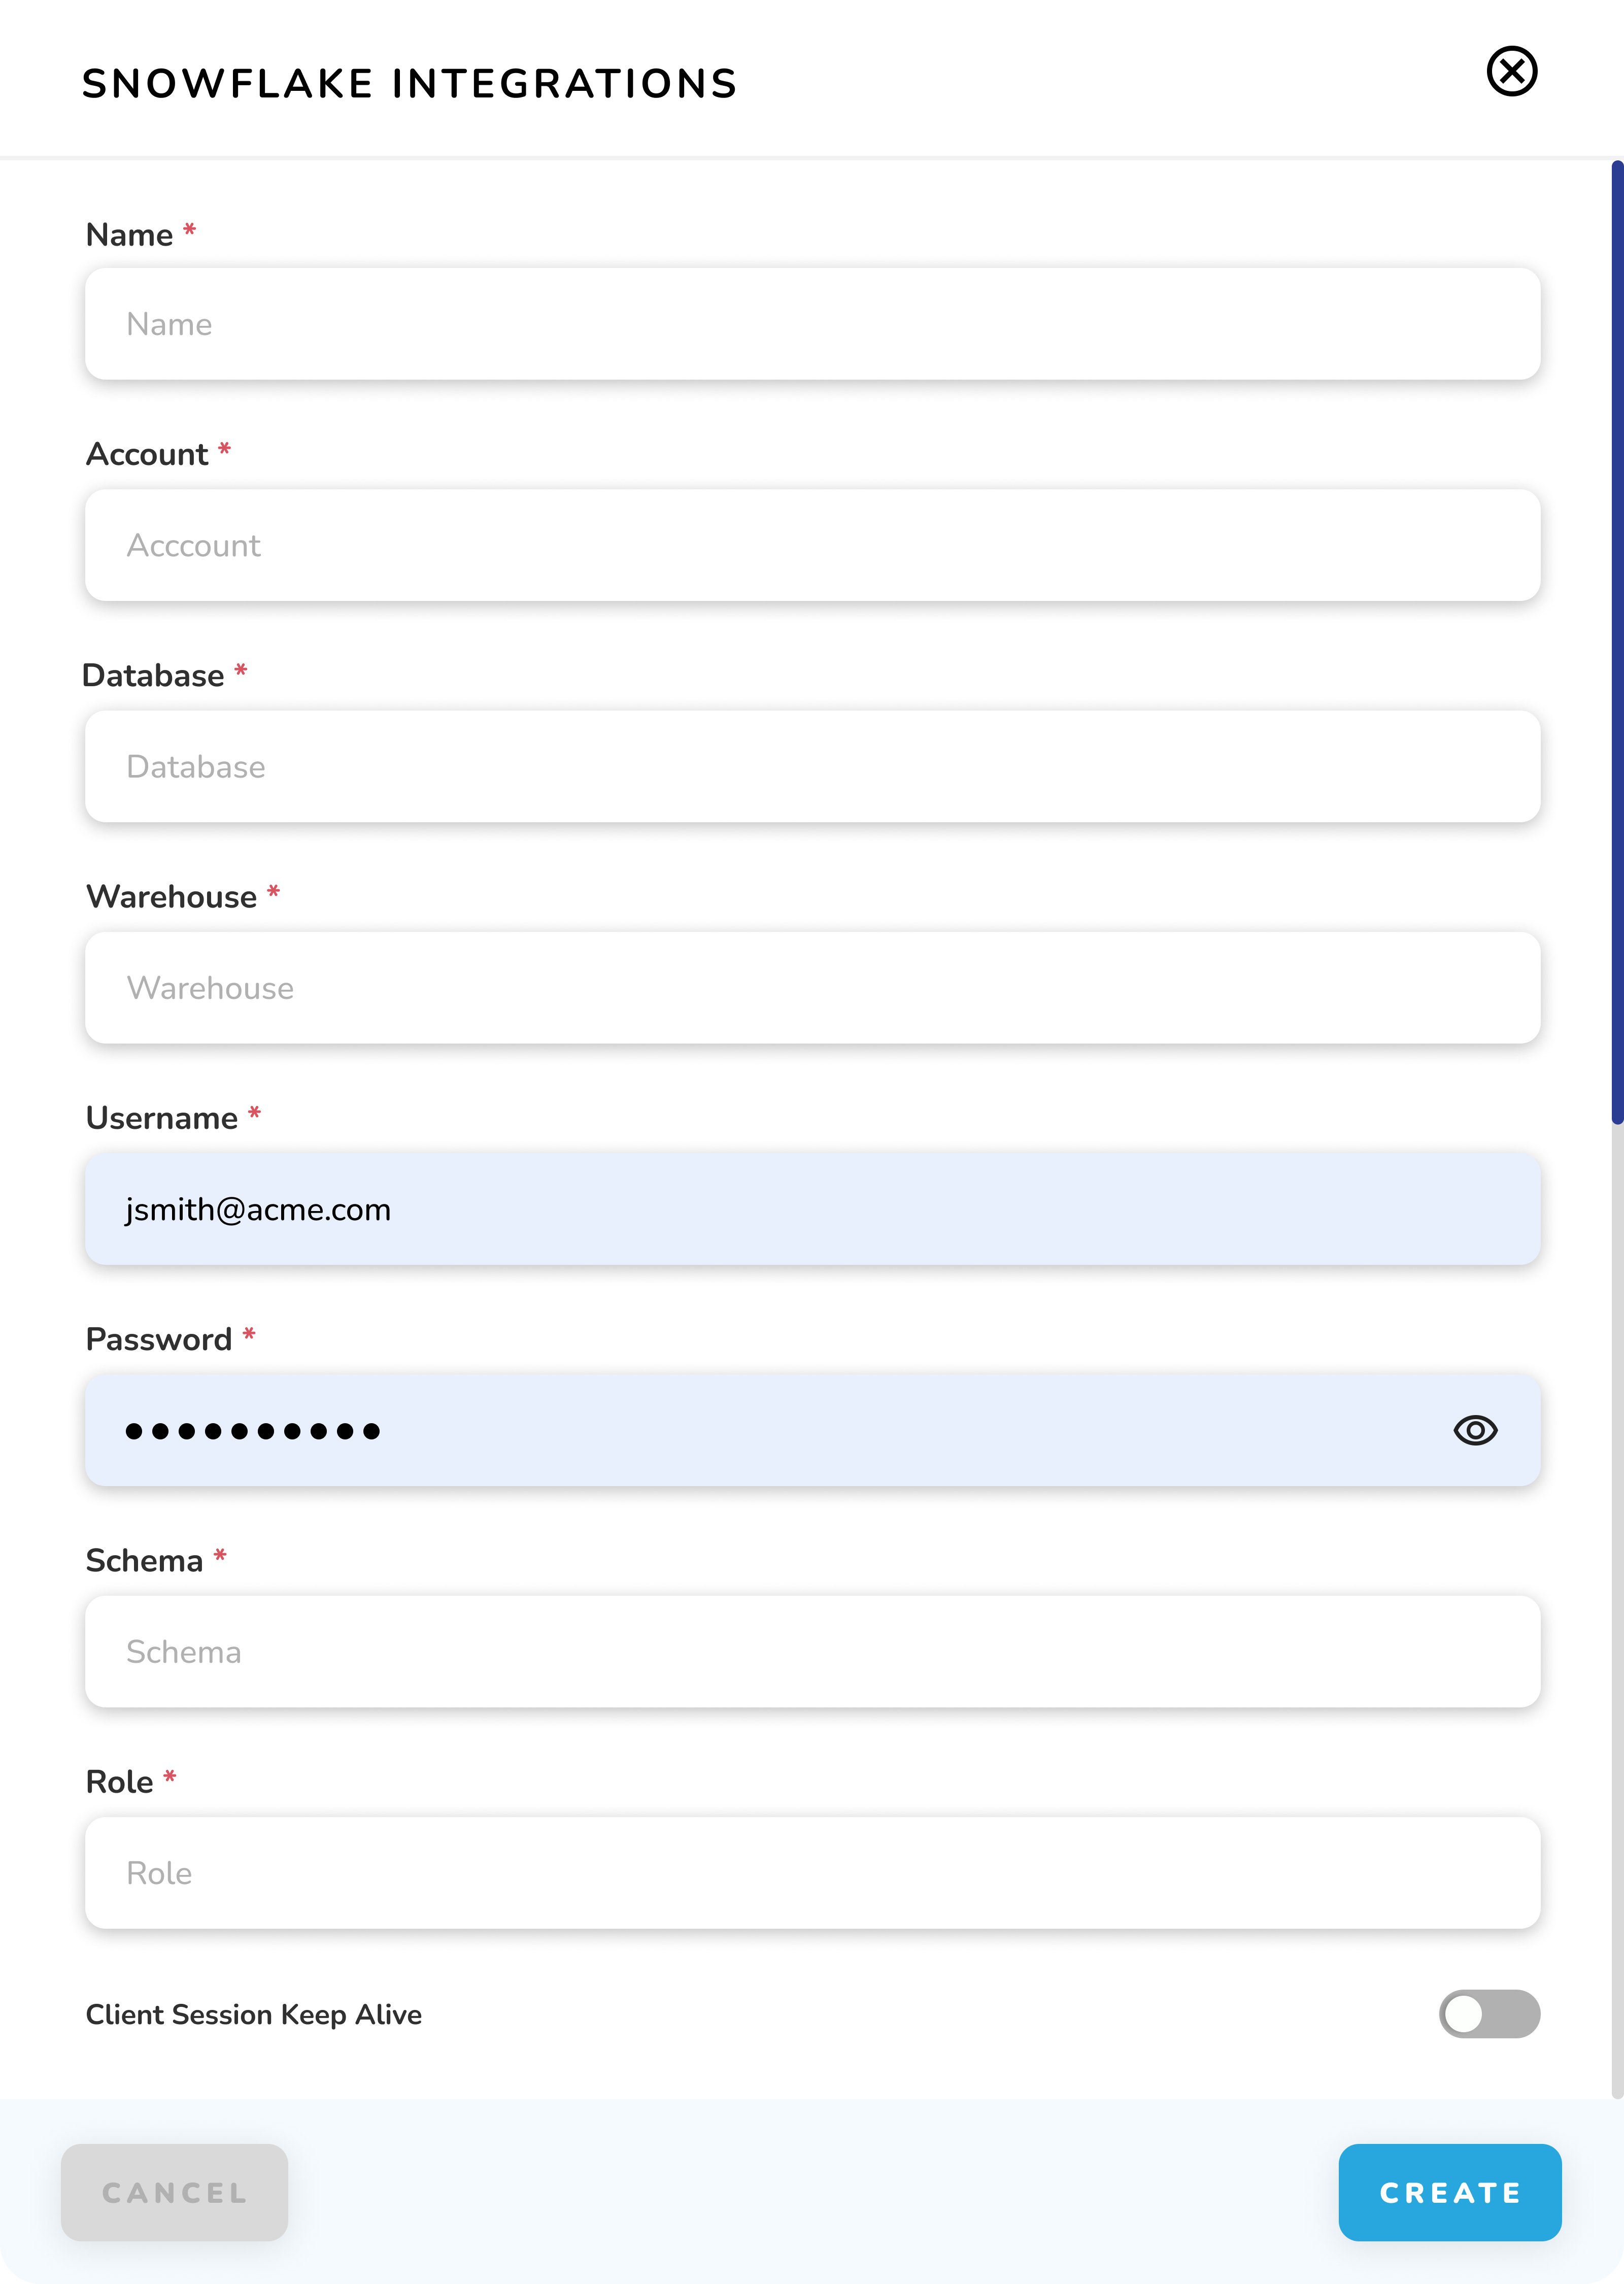 Figure 2: New Snowflake Integration Configuration Form
Workflow Configuration
Step 1: Accessing Workflow Editor
Access the Flow Editor in StreamSpace to begin configuring your Snowflake workflow. The left sidebar contains all available components, including Snowflake-specific nodes.
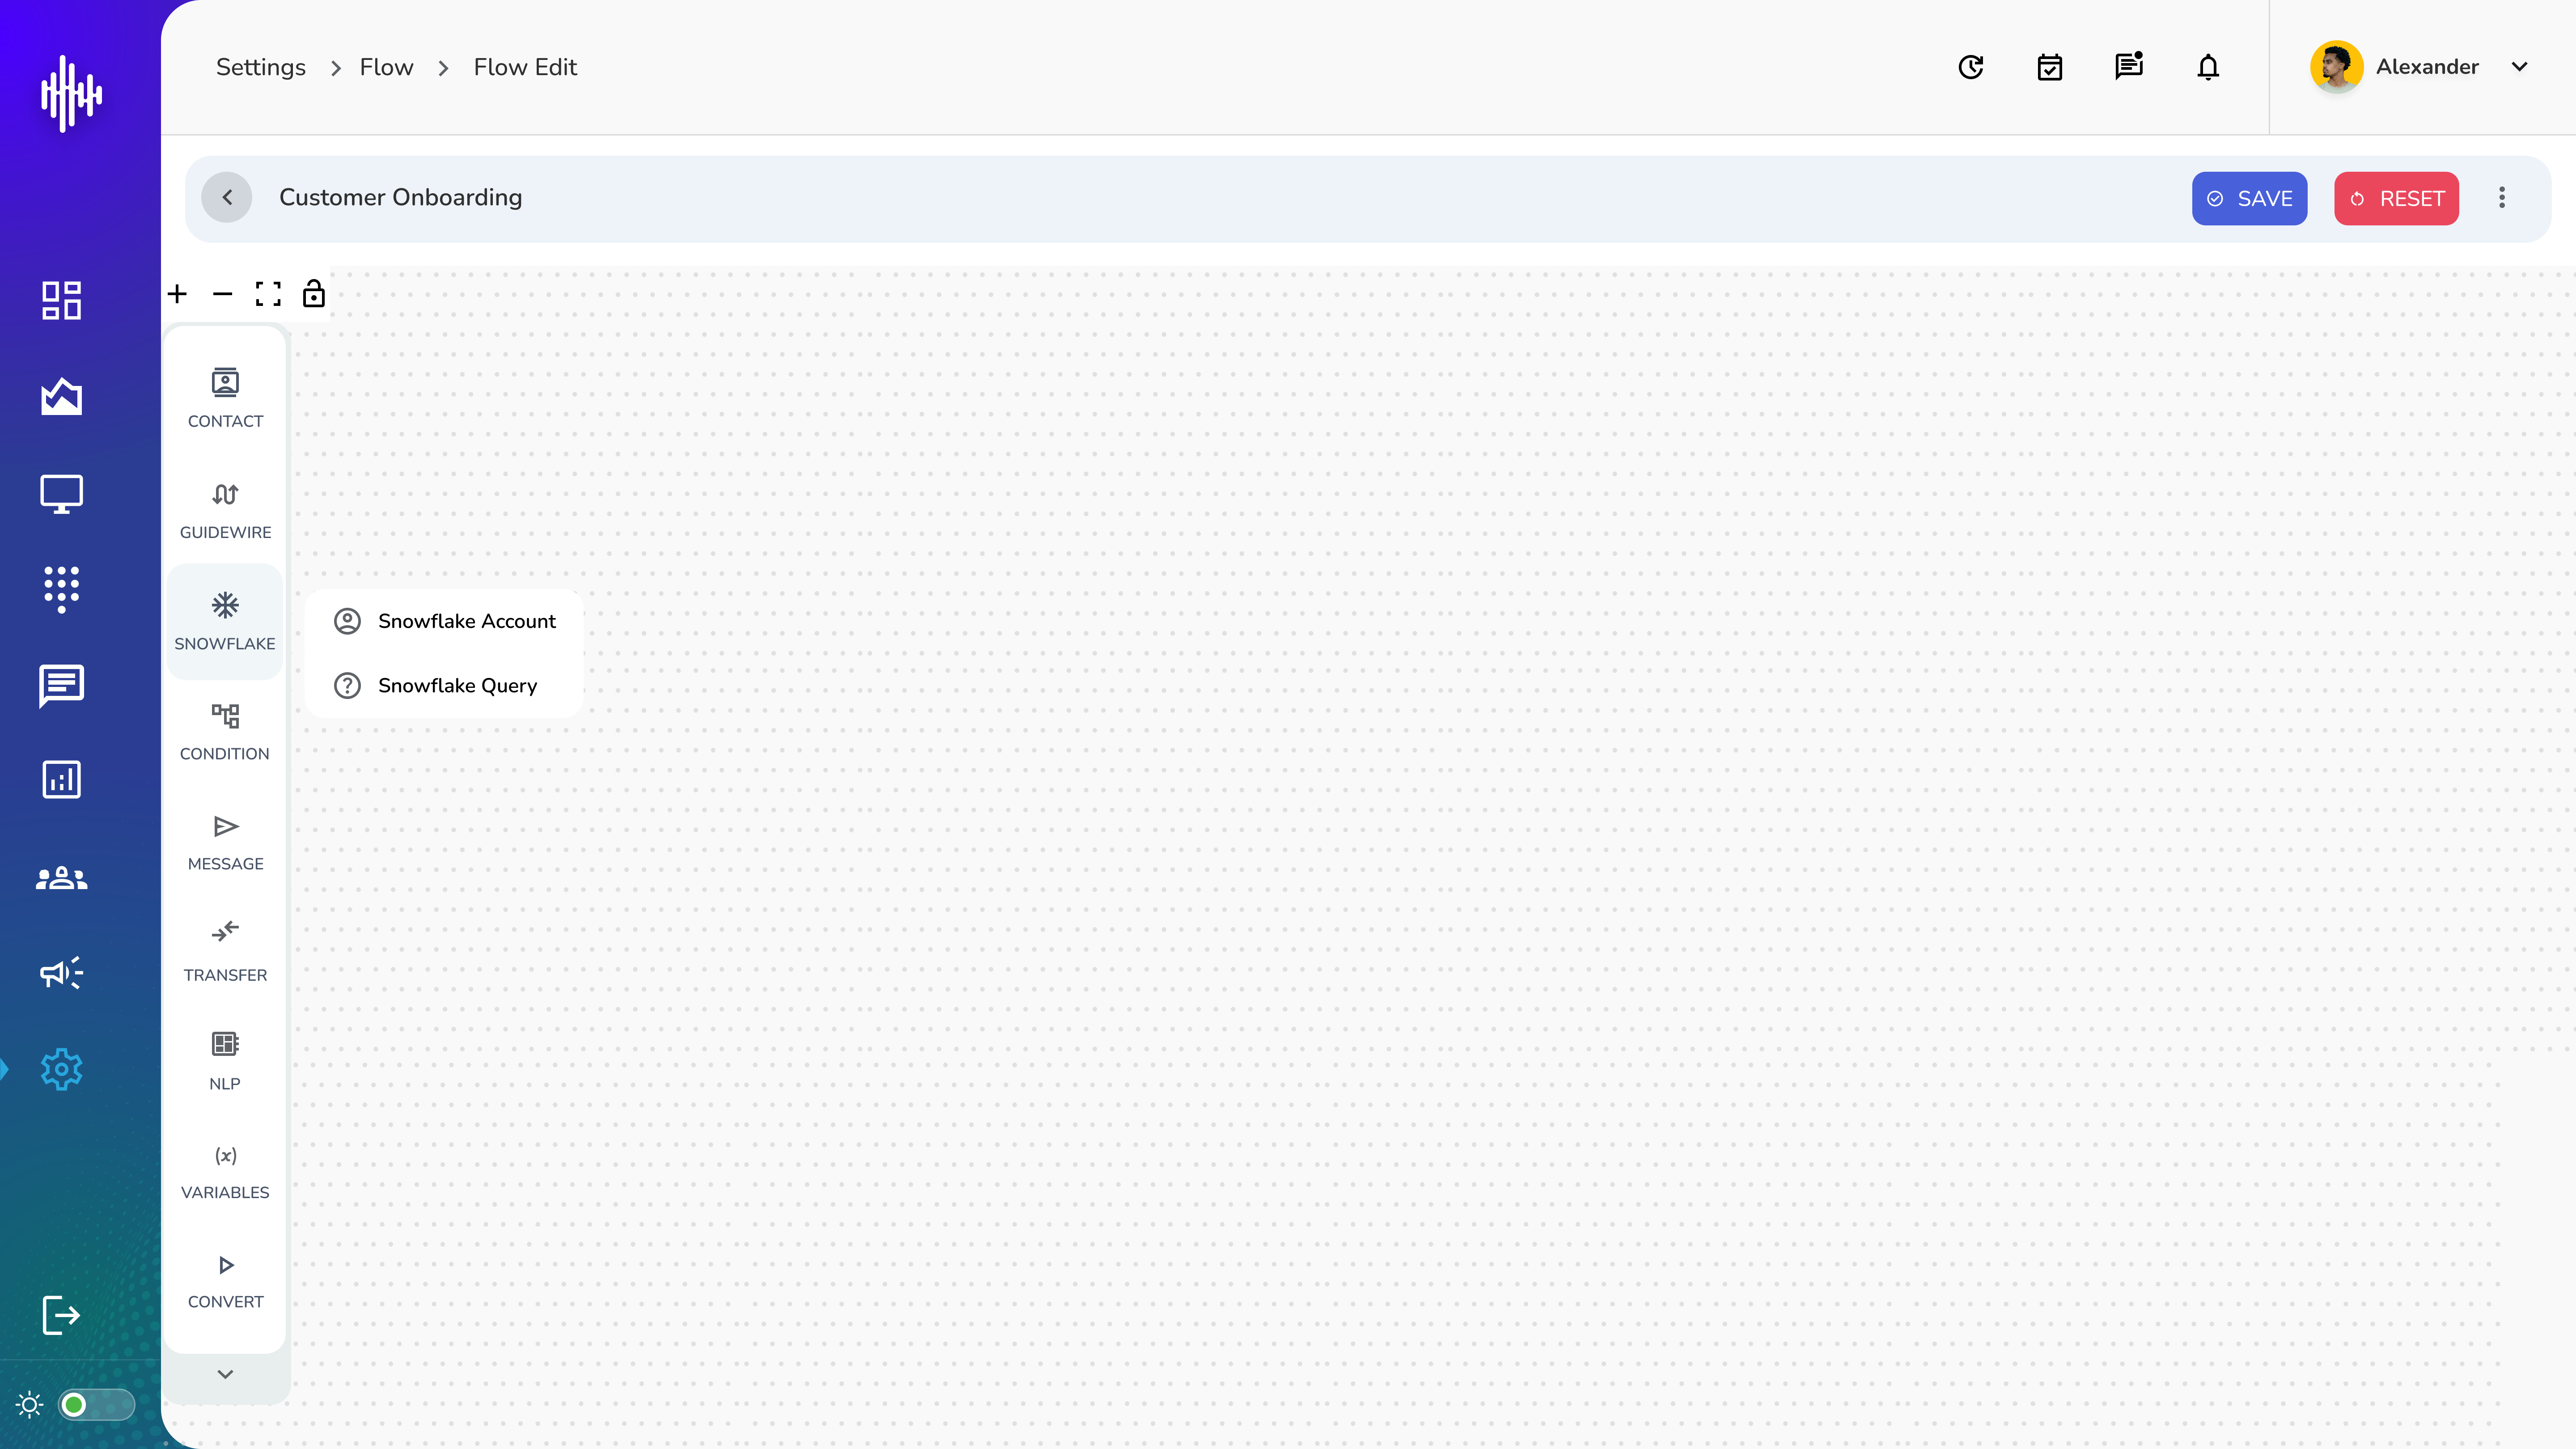 Figure 3: StreamSpace Flow Editor with Snowflake Components
Step 2: Adding Snowflake Nodes
- Drag the Snowflake node from the sidebar to your workflow
- Select your configured Snowflake account from the dropdown menu
- Configure the node settings as needed
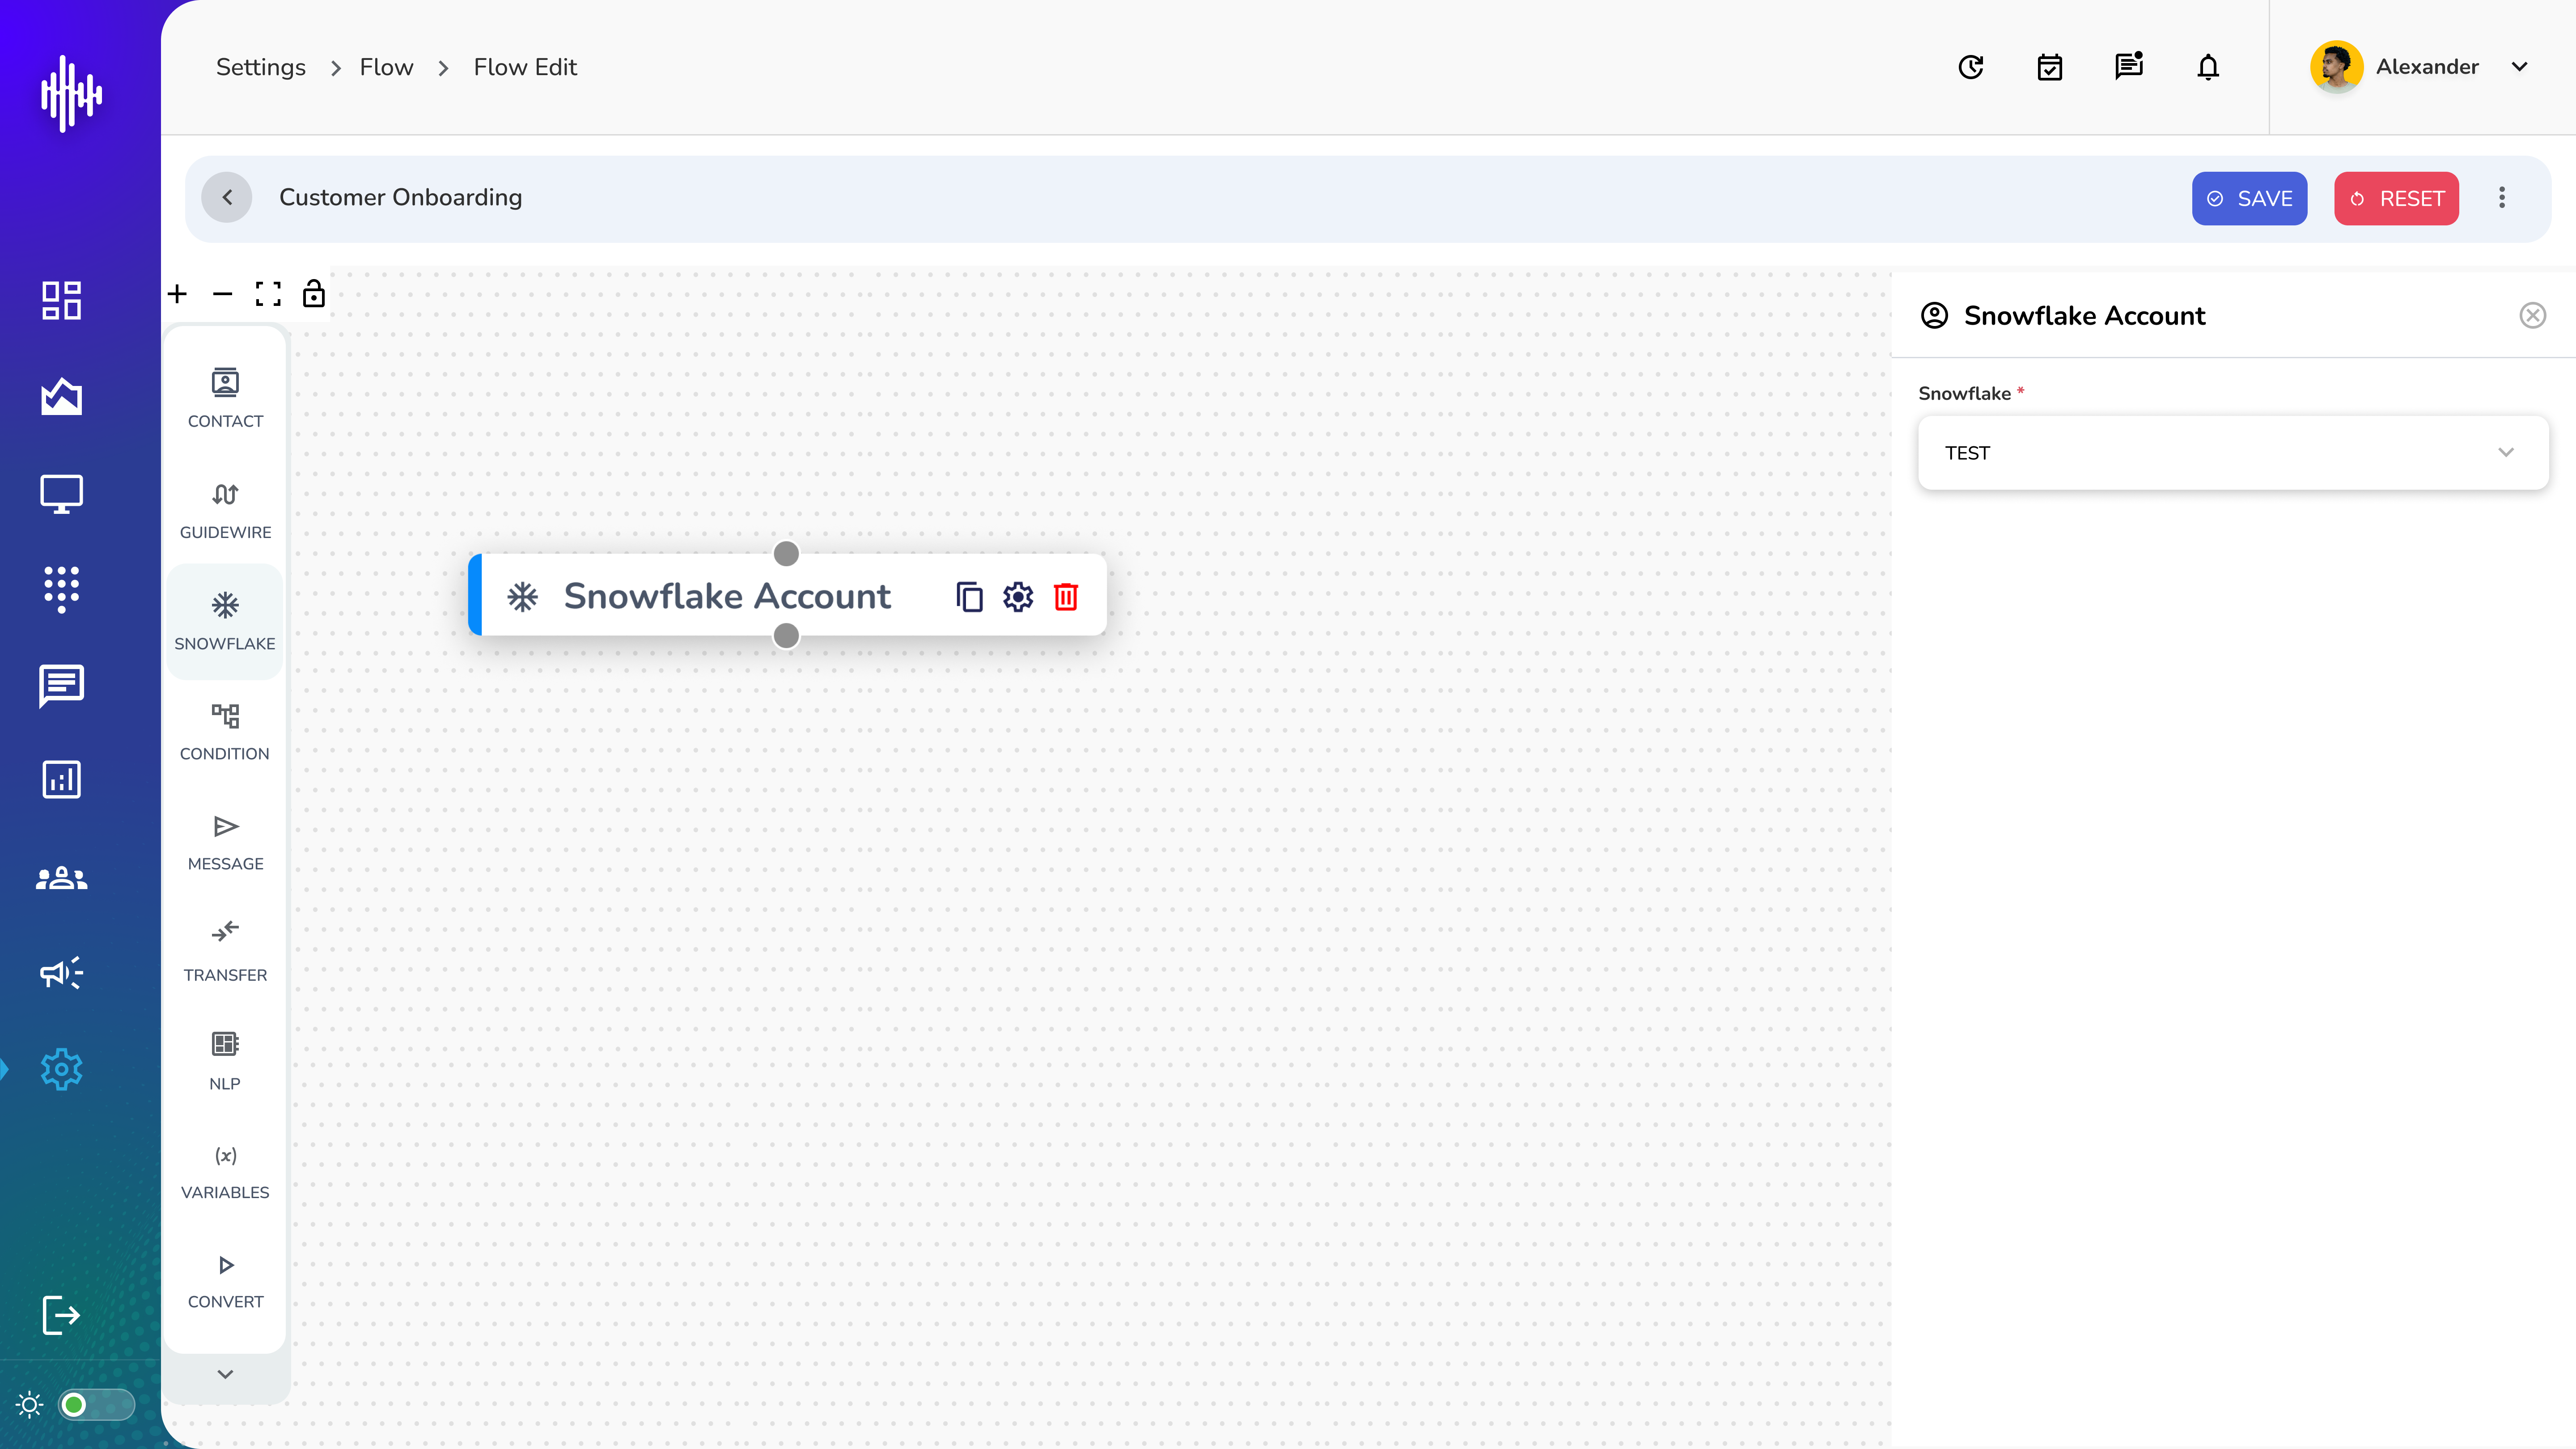 Figure 4: Snowflake Account Selection in Workflow
Query Configuration
Setting Up Queries
The Snowflake Query node allows you to execute SQL queries against your Snowflake database. Configure your queries with proper parameters and handle success/failure scenarios appropriately.
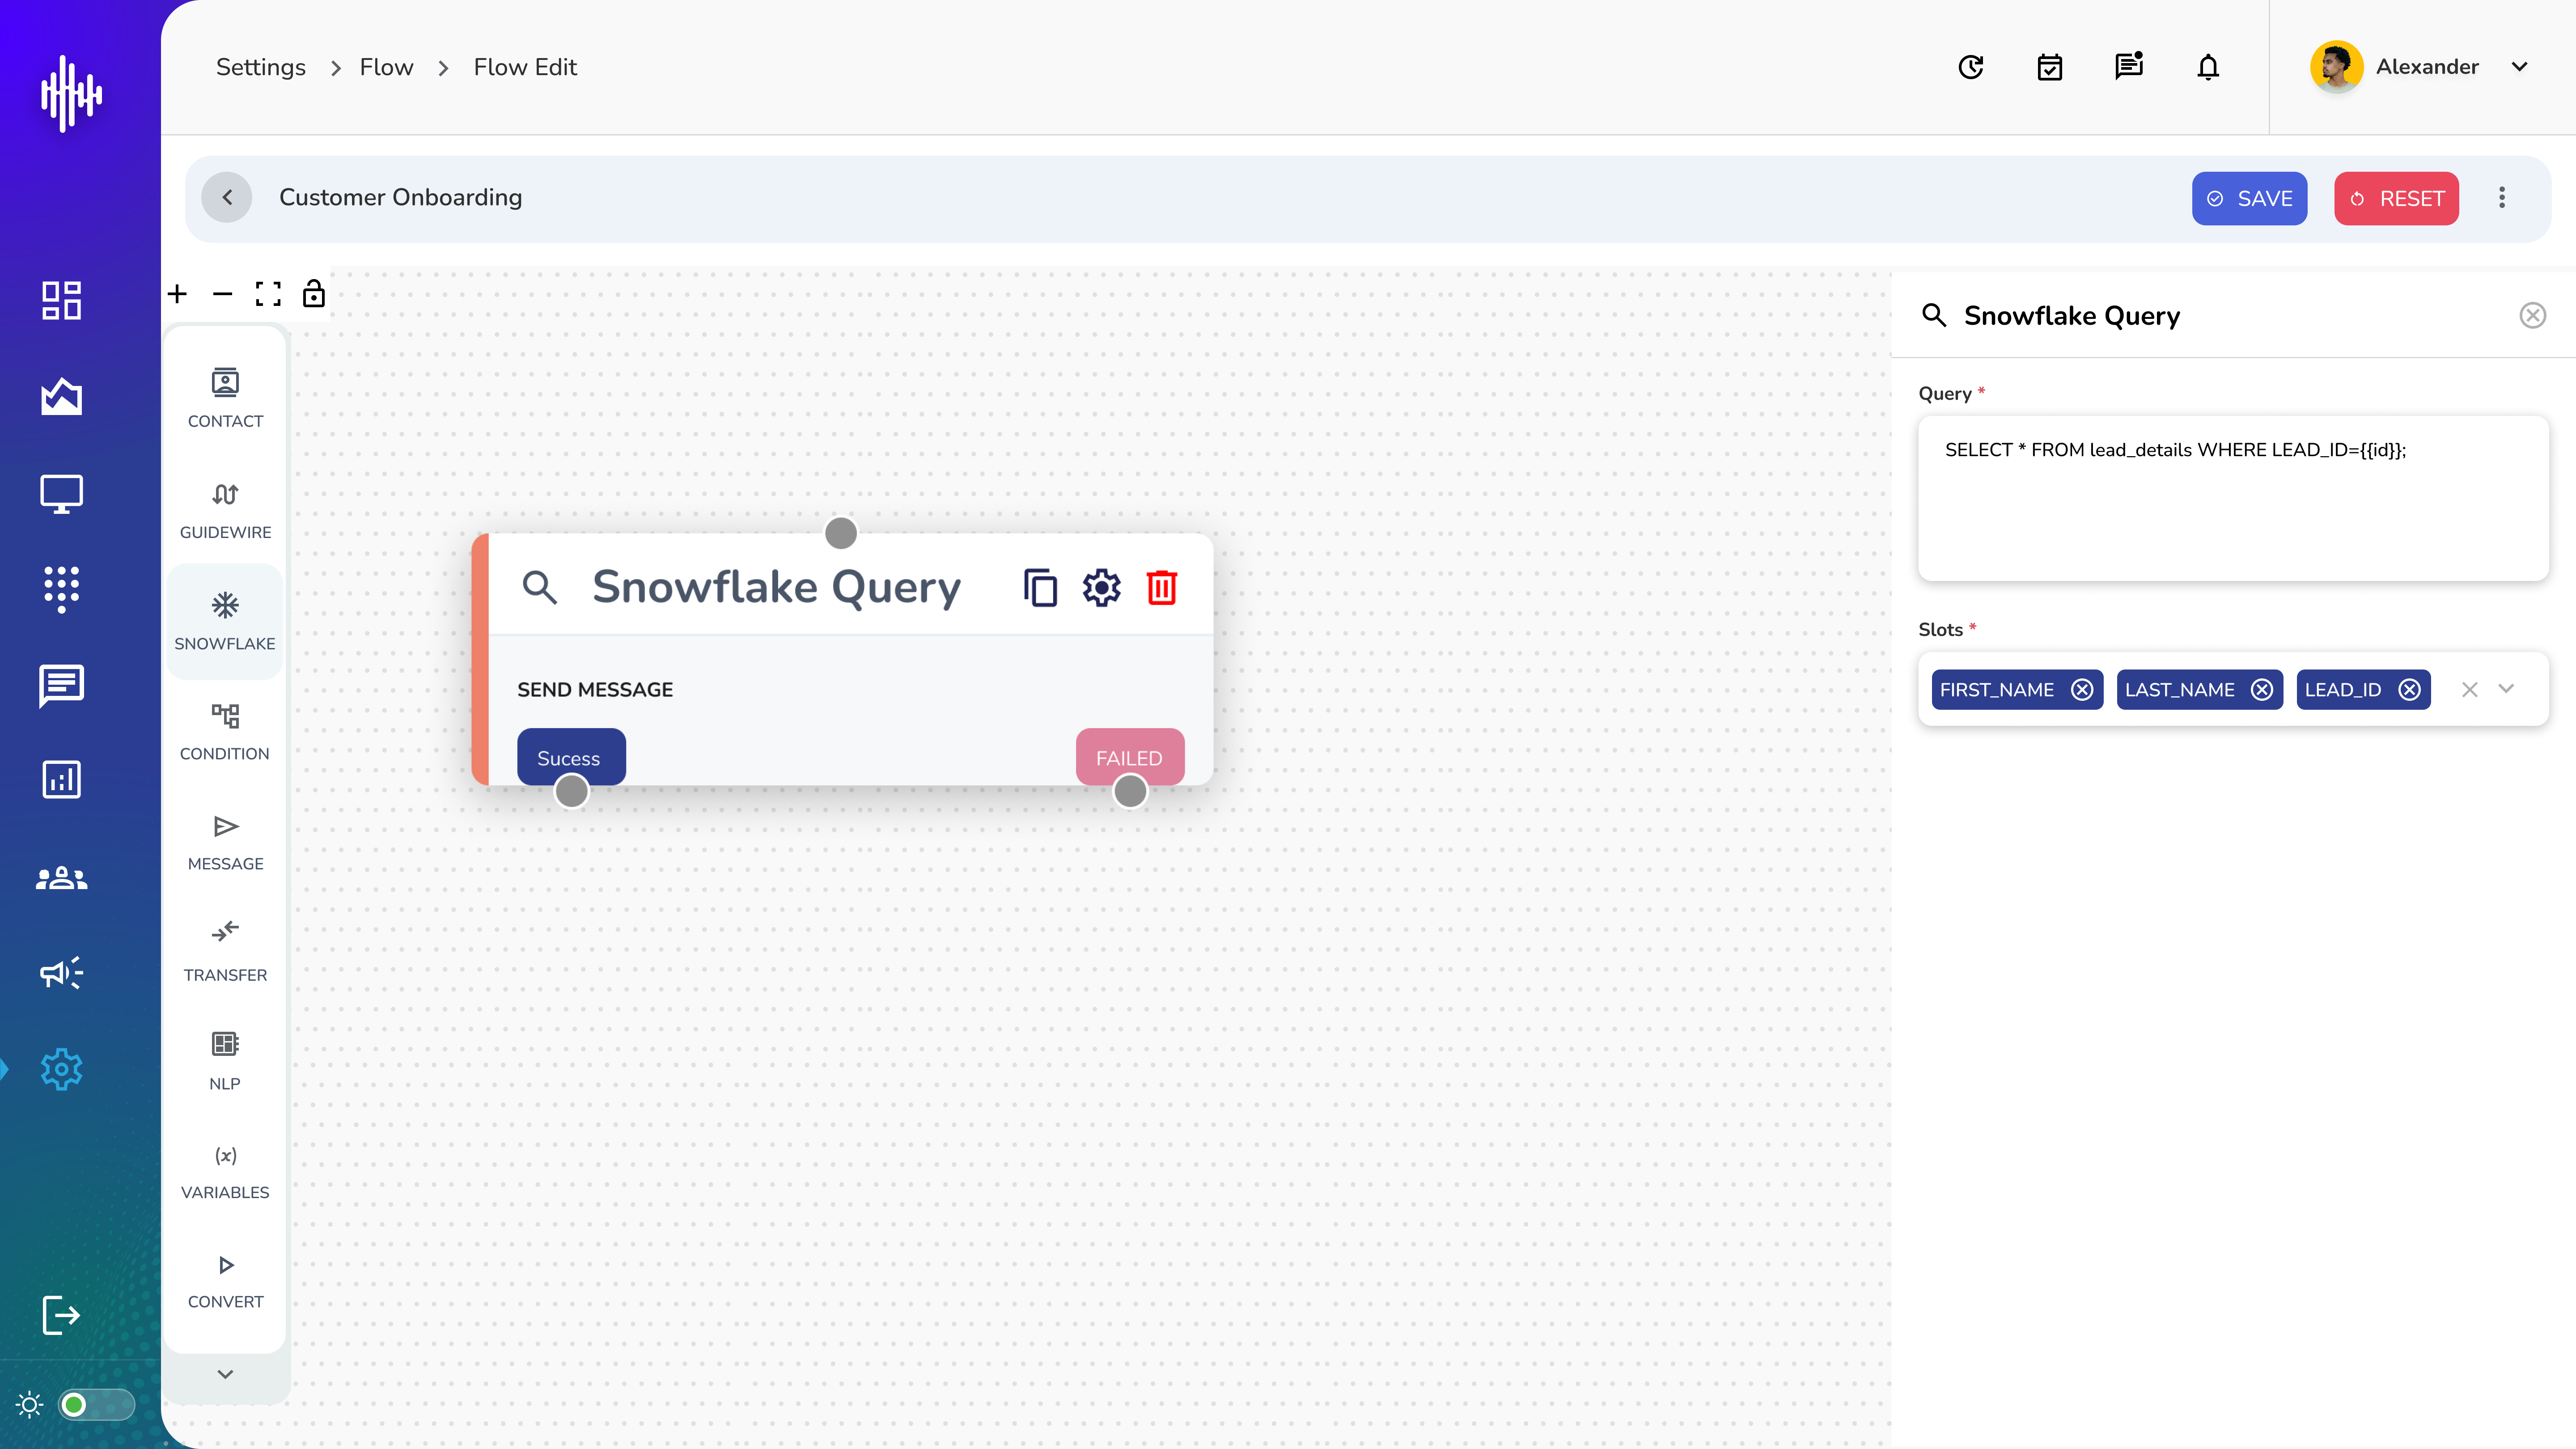 Figure 5: Snowflake Query Node Configuration
Query Components
- Query Editor: Input area for SQL statements
- Parameter Selection: Dynamic field mapping (e.g., FIRST_NAME, LAST_NAME, LEAD_ID)
- Success/Failure Handling: Built-in error management and success path configuration
Best Practices
-
Security
- Regularly rotate credentials
- Use minimum required permissions
- Enable session management when needed
-
Performance
- Optimize warehouse selection
- Configure appropriate timeouts
- Monitor query performance
-
Maintenance
- Regular testing of connections
- Monitoring of integration health
- Documentation of custom configurations
Troubleshooting
Common issues and resolutions:
-
Connection Failures
- Verify credentials
- Check network connectivity
- Confirm warehouse availability
-
Query Errors
- Validate SQL syntax
- Confirm schema permissions
- Check parameter mapping
Support and Resources
- Snowflake API Documentation
- SQL Command Reference
- StreamSpace Platform Support
- Integration Support Team