WhatsApp Provider
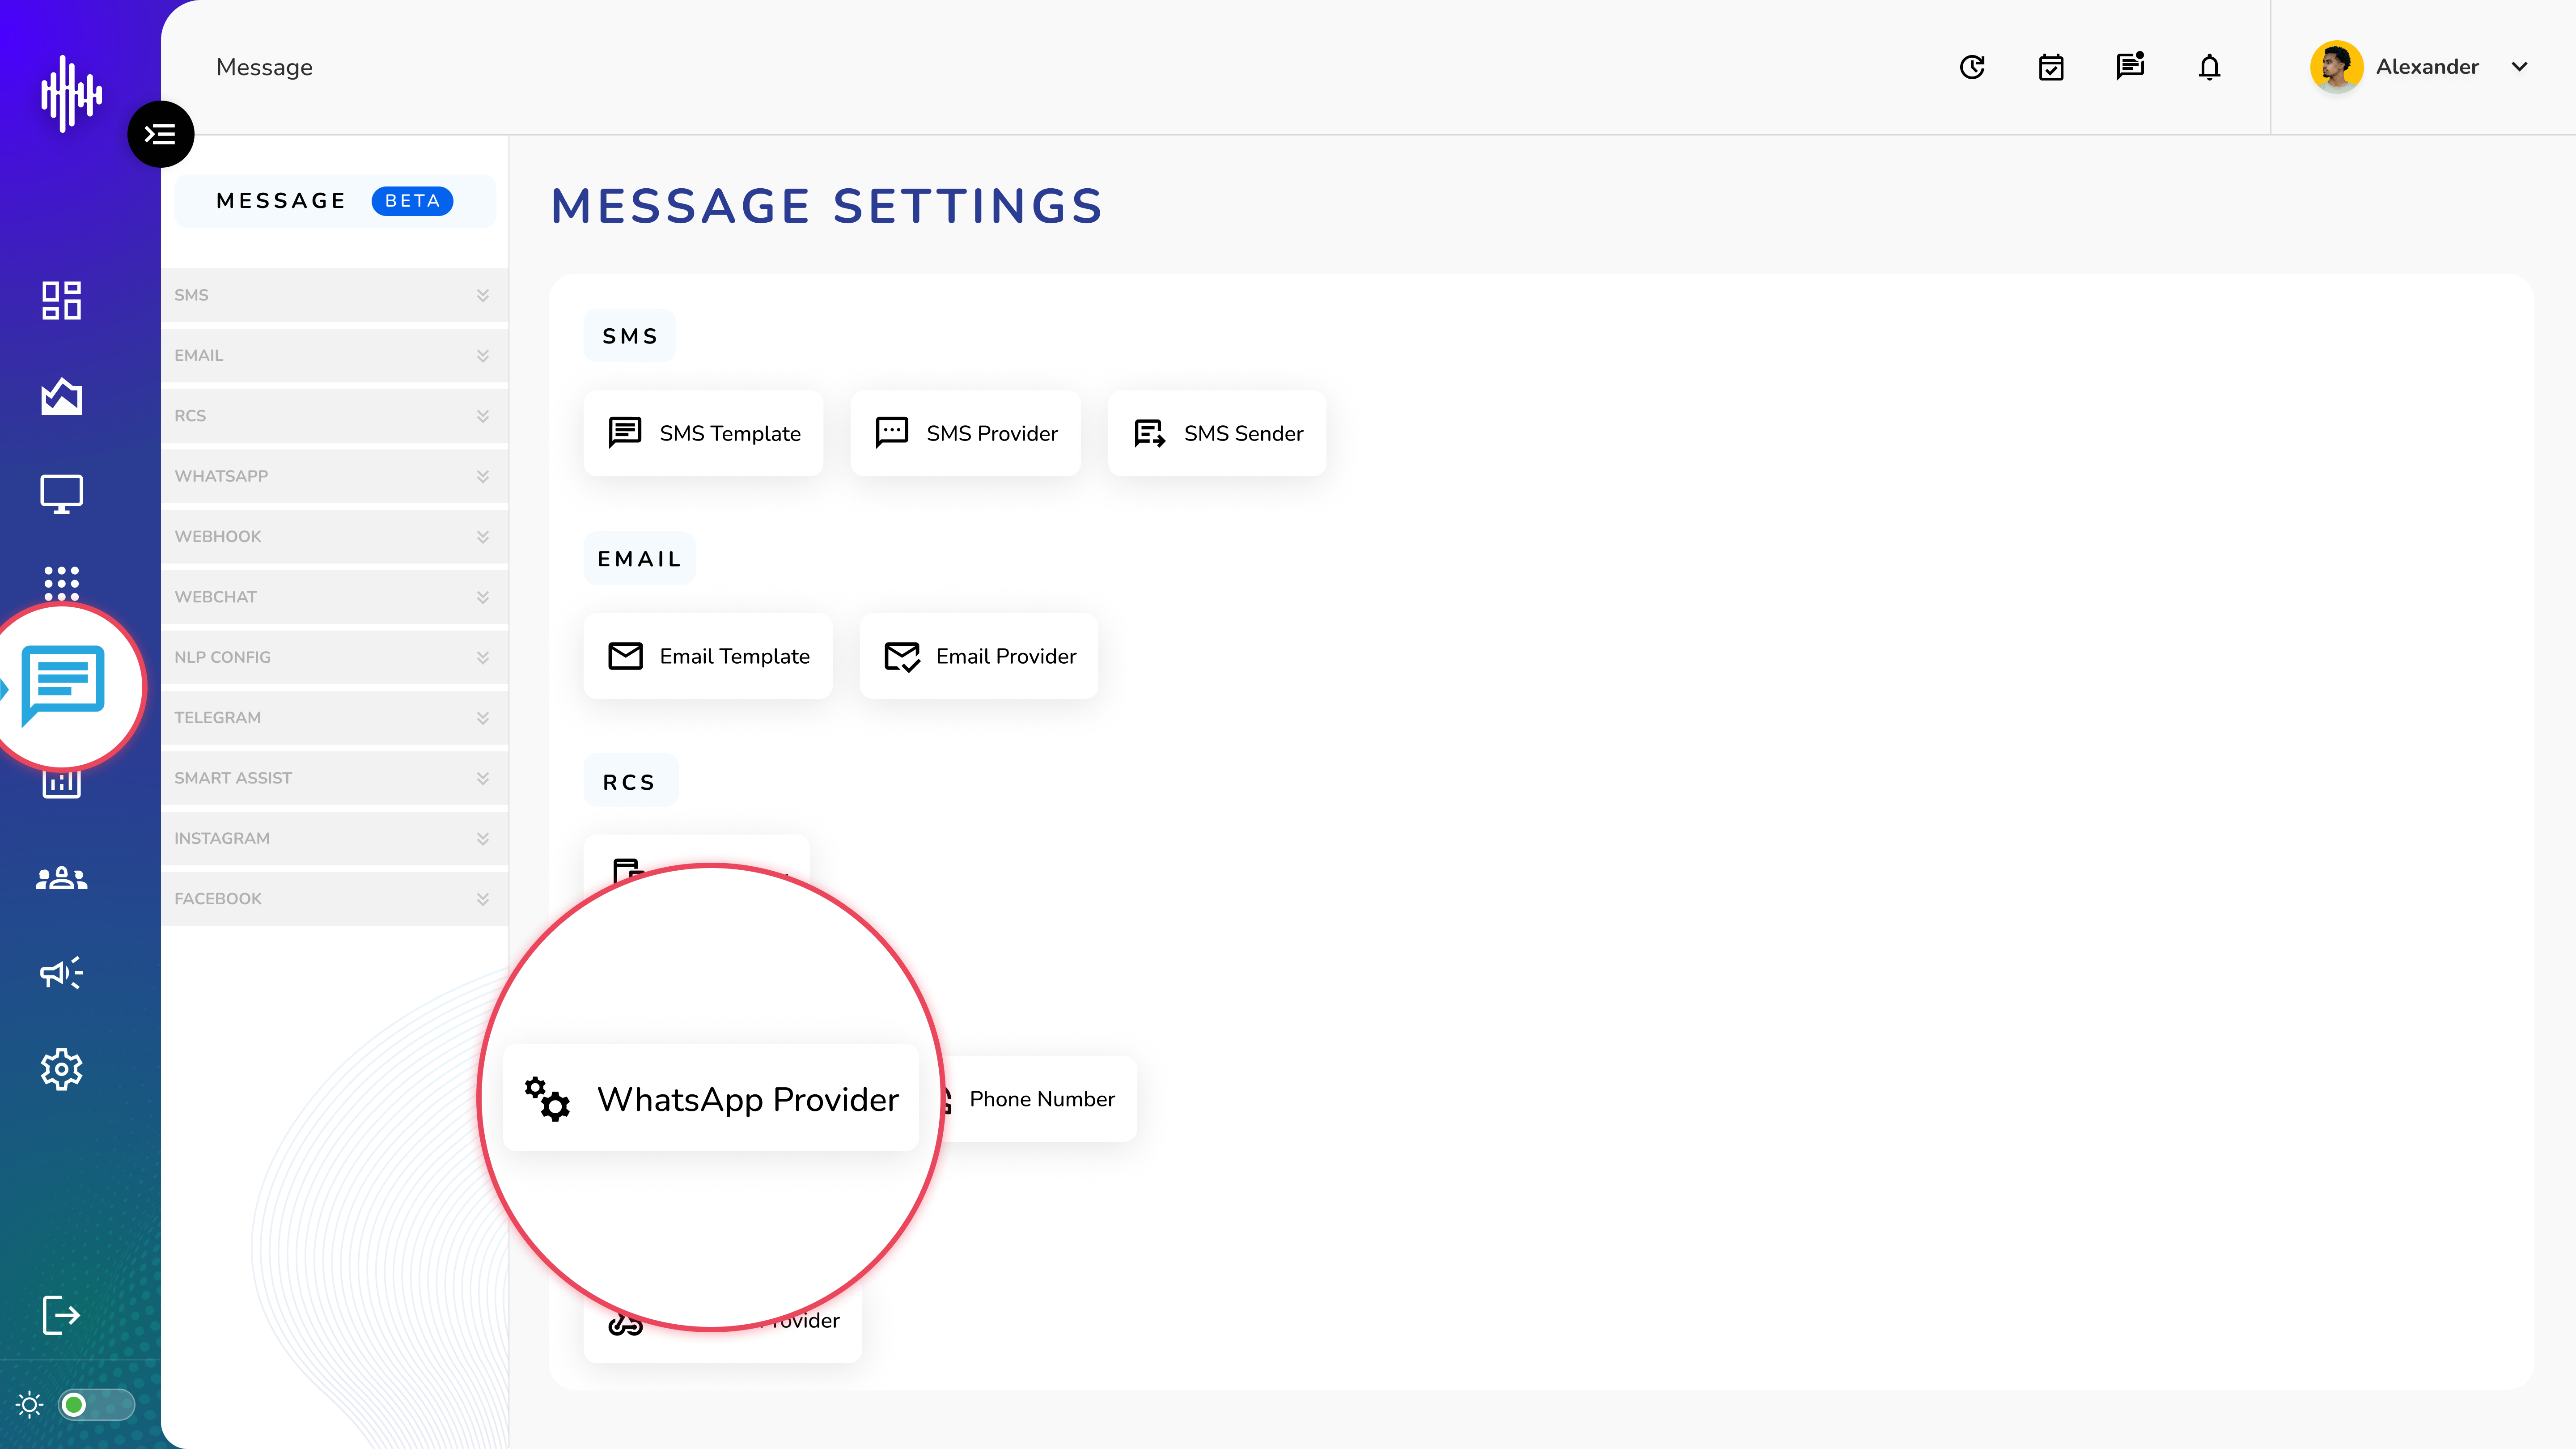
1. Login to your admin account
2. Click "Message" from the left side menu
3. Click “WhatsApp Provider” to access the WhatsApp Provider's details.
WhatsApp Provider Management
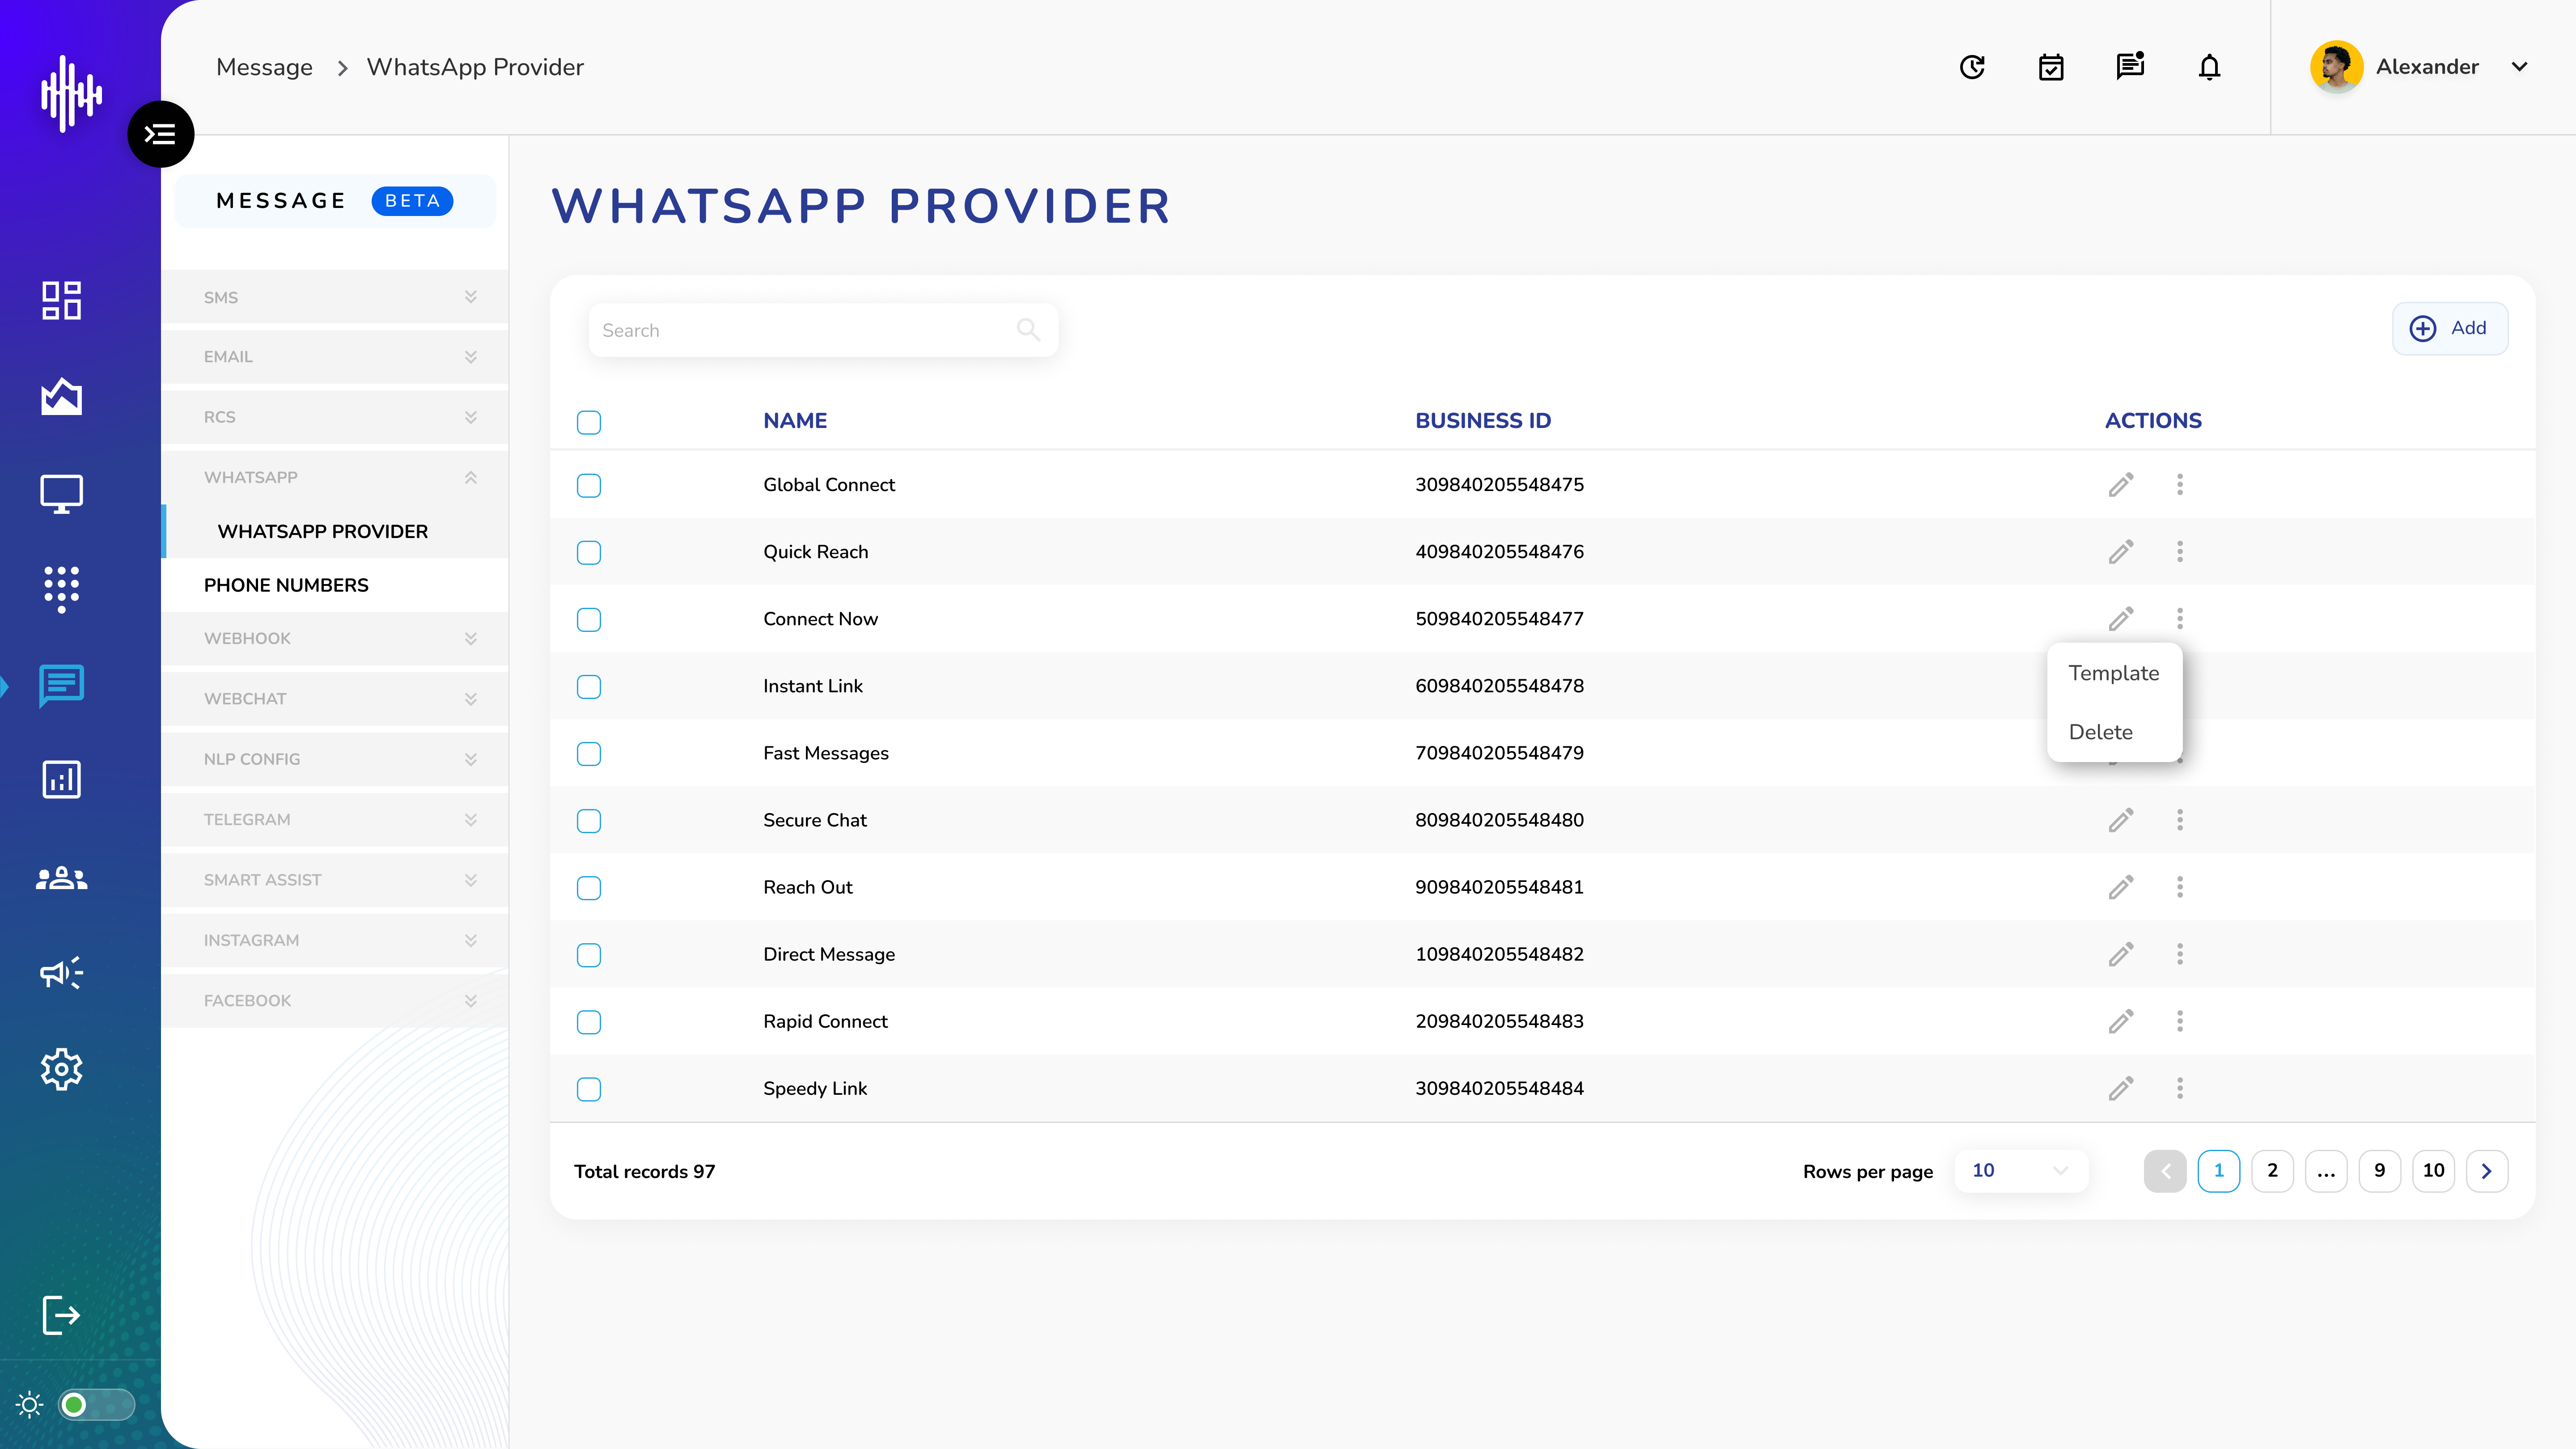
1. WhatsApp Provider Screen Elements
| Column | Description |
|---|---|
| Name | Provider identifier |
| Business ID | WhatsApp Business ID |
2. List View Features
a. Top Bar
i. Search functionality
ii. "+Add" button for new providers
b. Available Actions
i. Pencil Icon: Edit configuration
ii. Three Dots Menu:
1. Template: View message templates
2. Delete: Remove provider
3. Navigation Features
a. Search for providers
b. Adjustable rows per page
c. Pagination controls
d. Total records counter
4. Provider Management
a. Create new providers
b. Edit existing configurations
c. Manage message templates
d. Remove unused providers
Important Notes:
-
Business ID must be valid
-
Template management required for messaging
-
Verify credentials before use
-
Keep provider details updated
Add WhatsApp Provider Guide
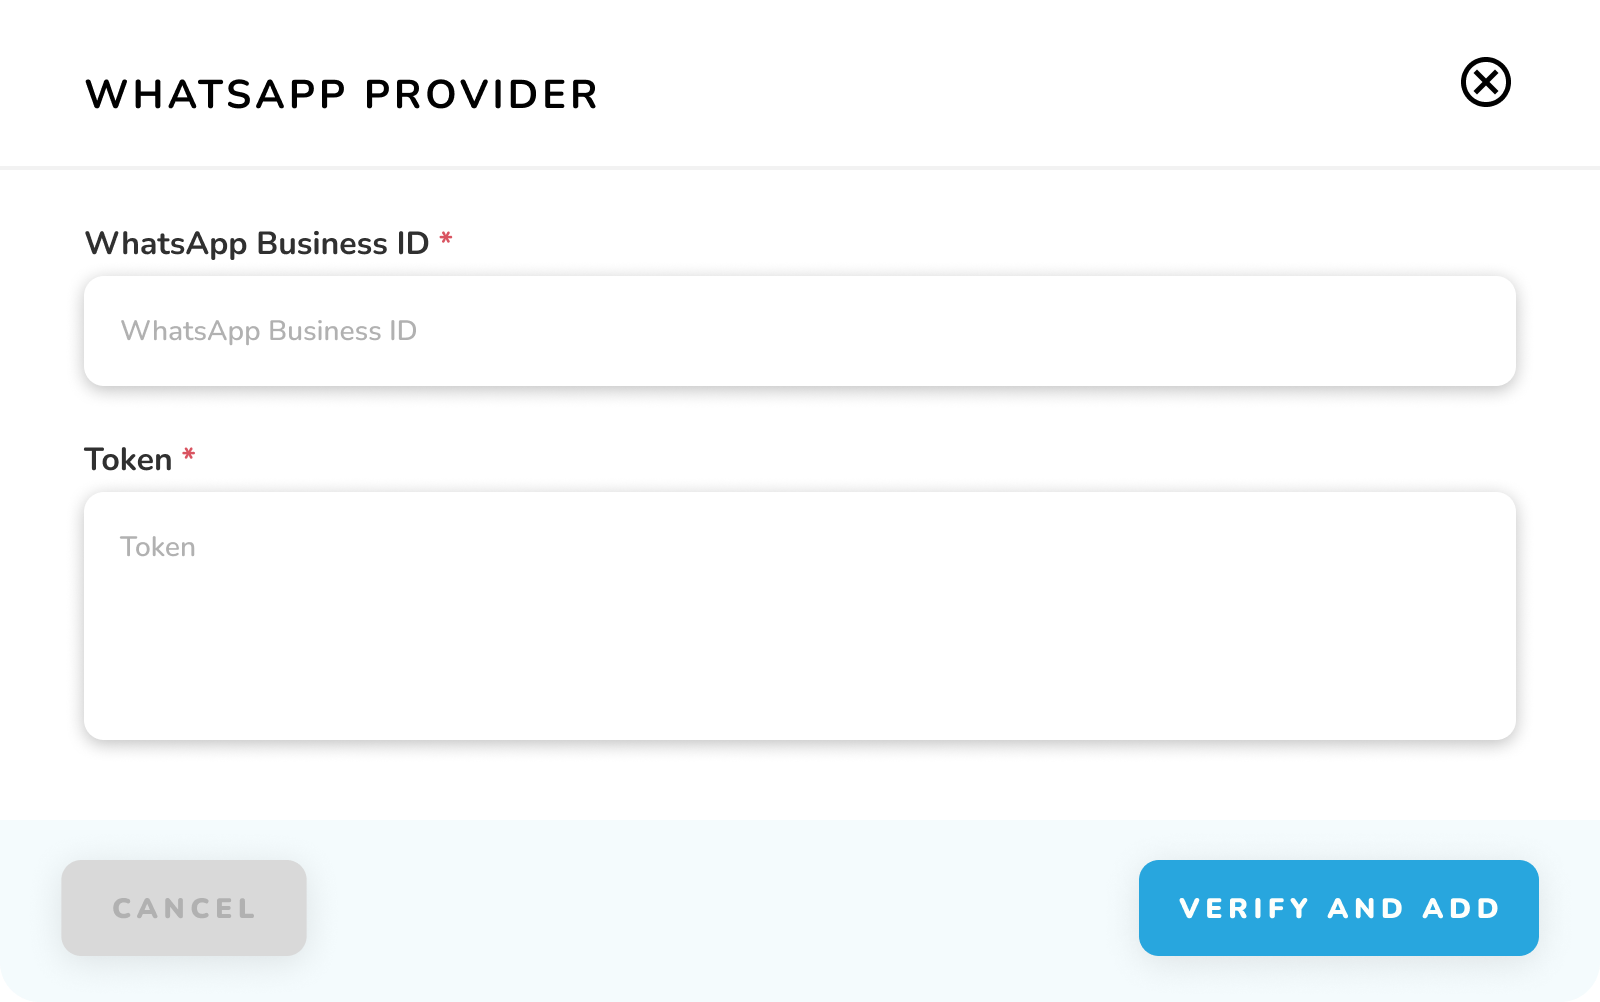
1. Required Fields
| Field | Description | Required |
|---|---|---|
| WhatsApp Business ID* | Your business account identifier | Yes |
| Token* | Authentication token | Yes |
2. Steps to Add Provider
a. Enter WhatsApp Business ID
i. Must be valid business account
ii. Format: numerical ID
b. Enter Token
i. Authentication token from WhatsApp Business API
ii. Keep secure and confidential
3. Action Buttons
a. CANCEL: Exit without saving
b. VERIFY AND ADD: Validates credentials and creates provider
Important Notes:
-
Both fields marked with * are mandatory
-
System verifies credentials before adding
-
Token must be valid and active
-
Business ID must be registered with WhatsApp