Smart Assist Provider
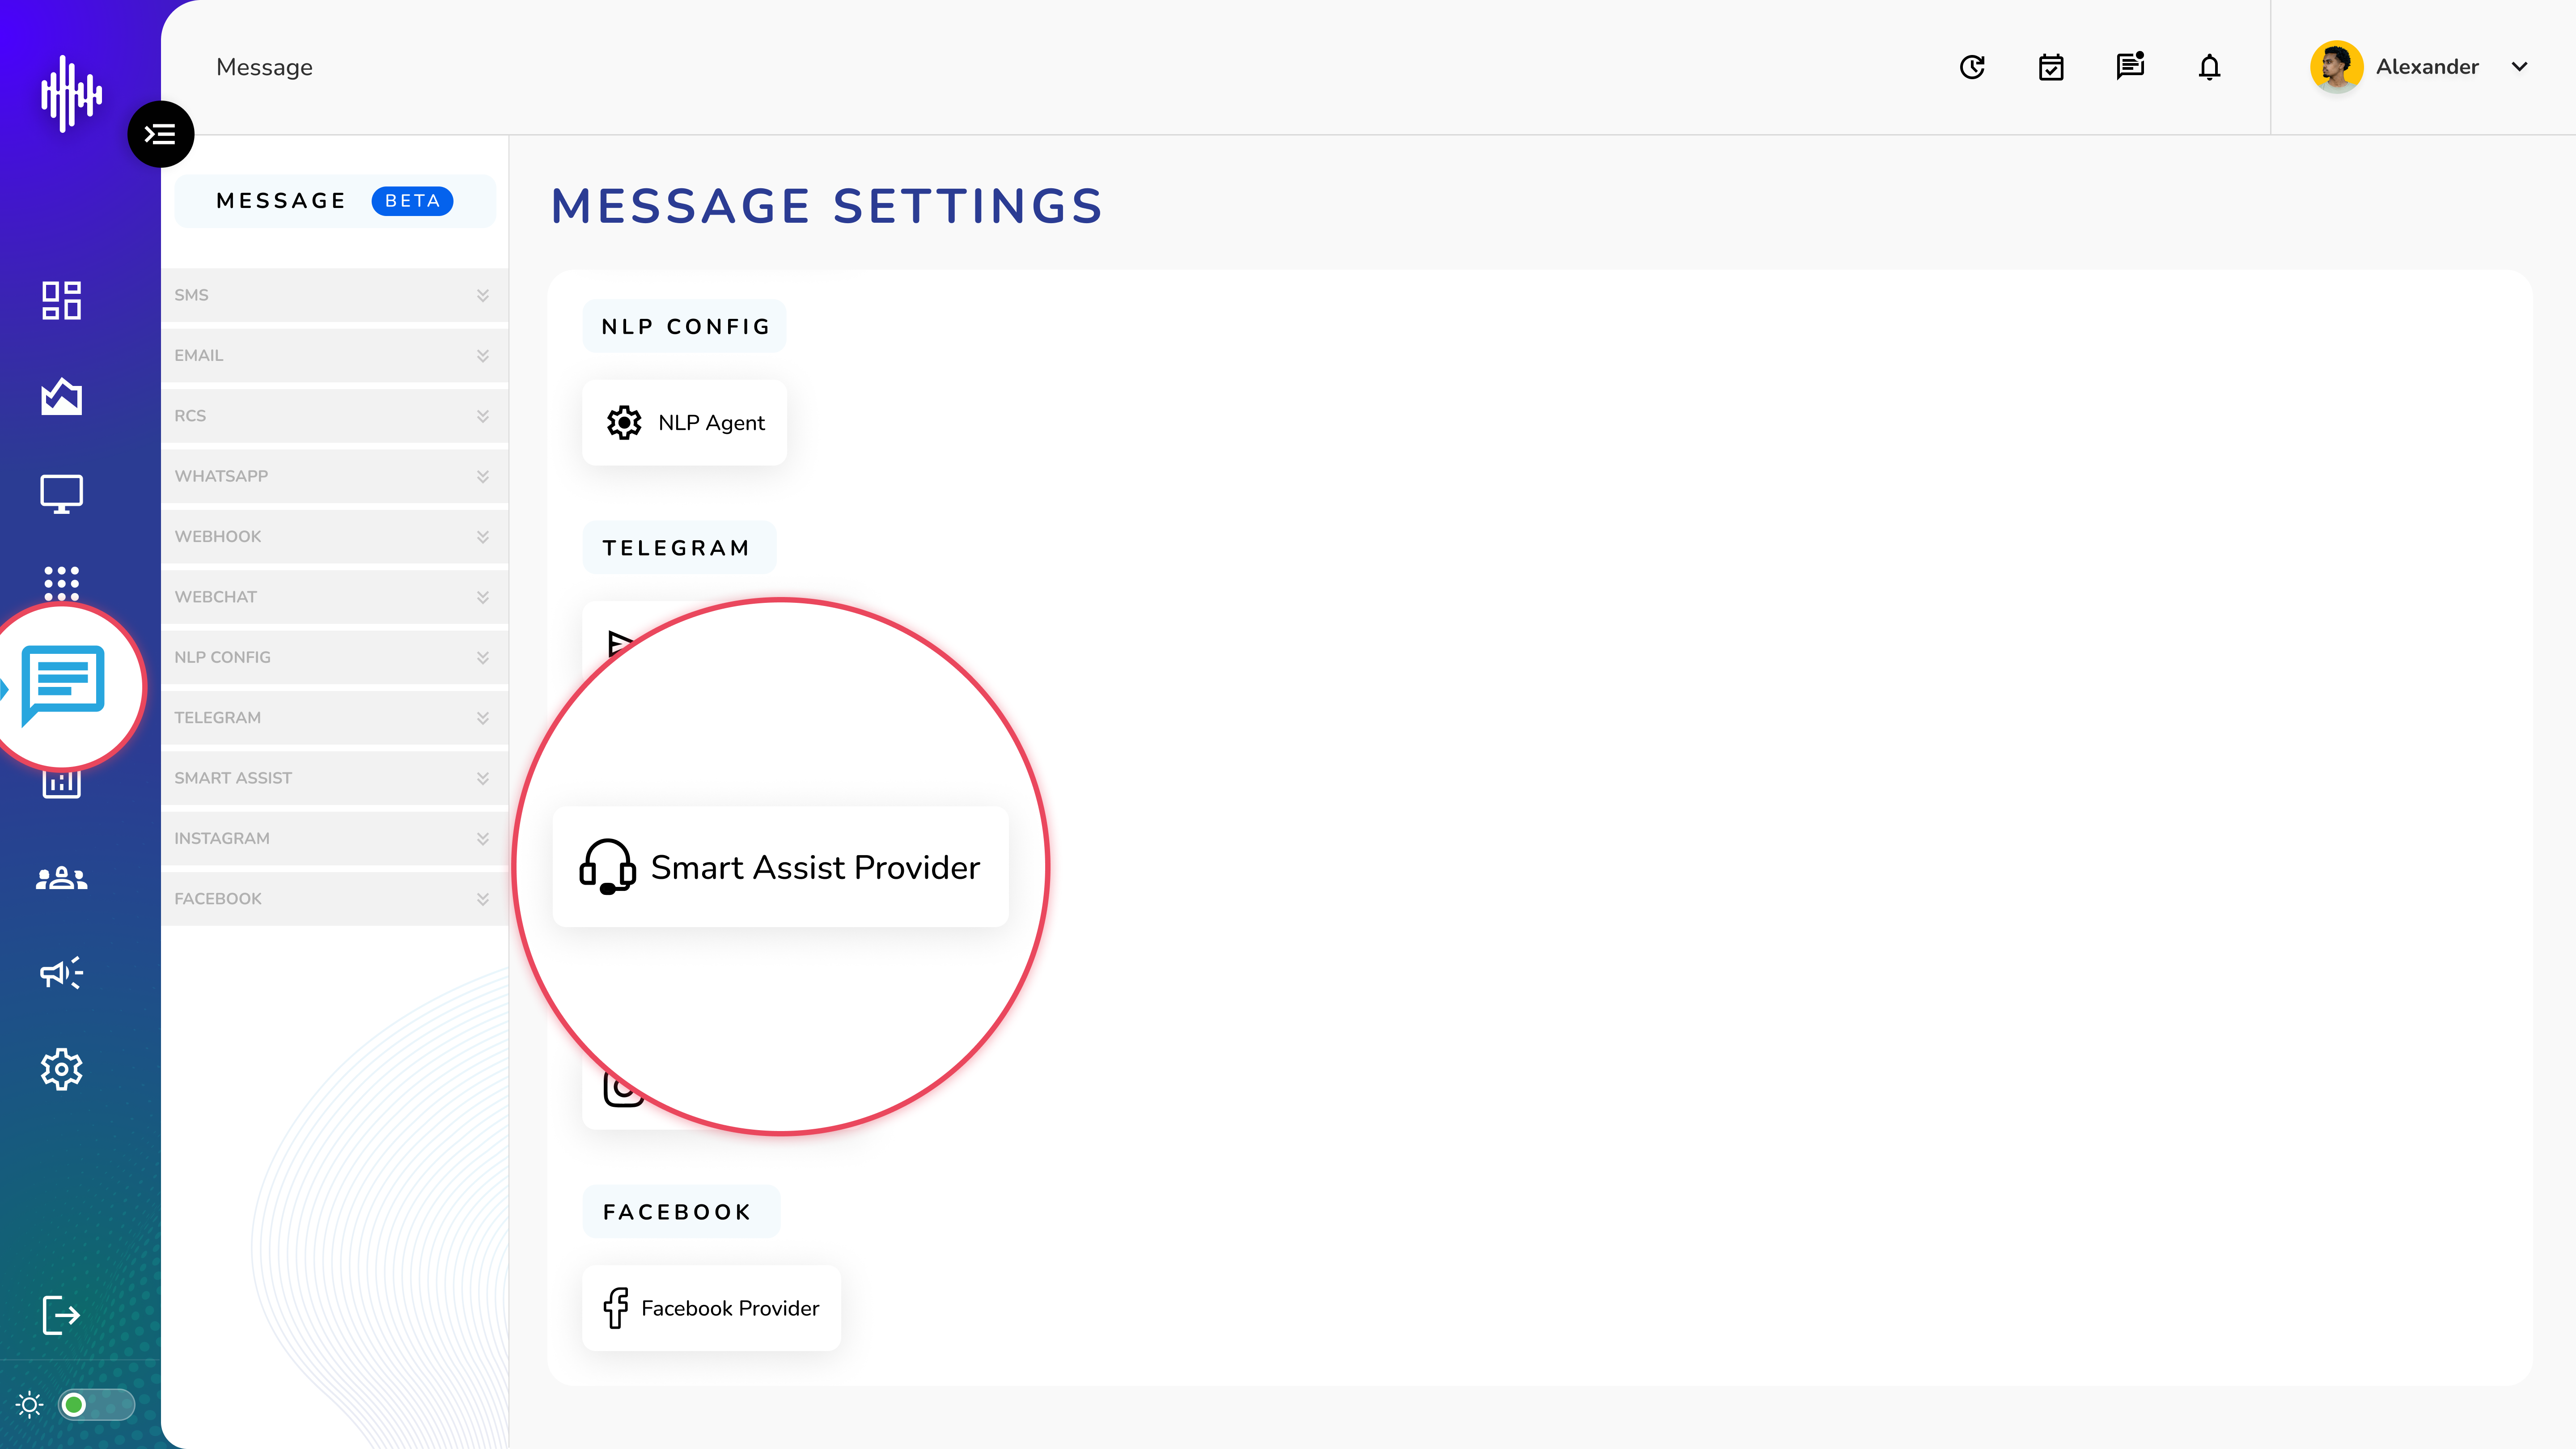
1. Login to your admin account
2. Click "Message" from the left side menu
3. Click “Smart Assist Provider” to access the Smart Assist Provider's details.
Smart Assist Provider Management
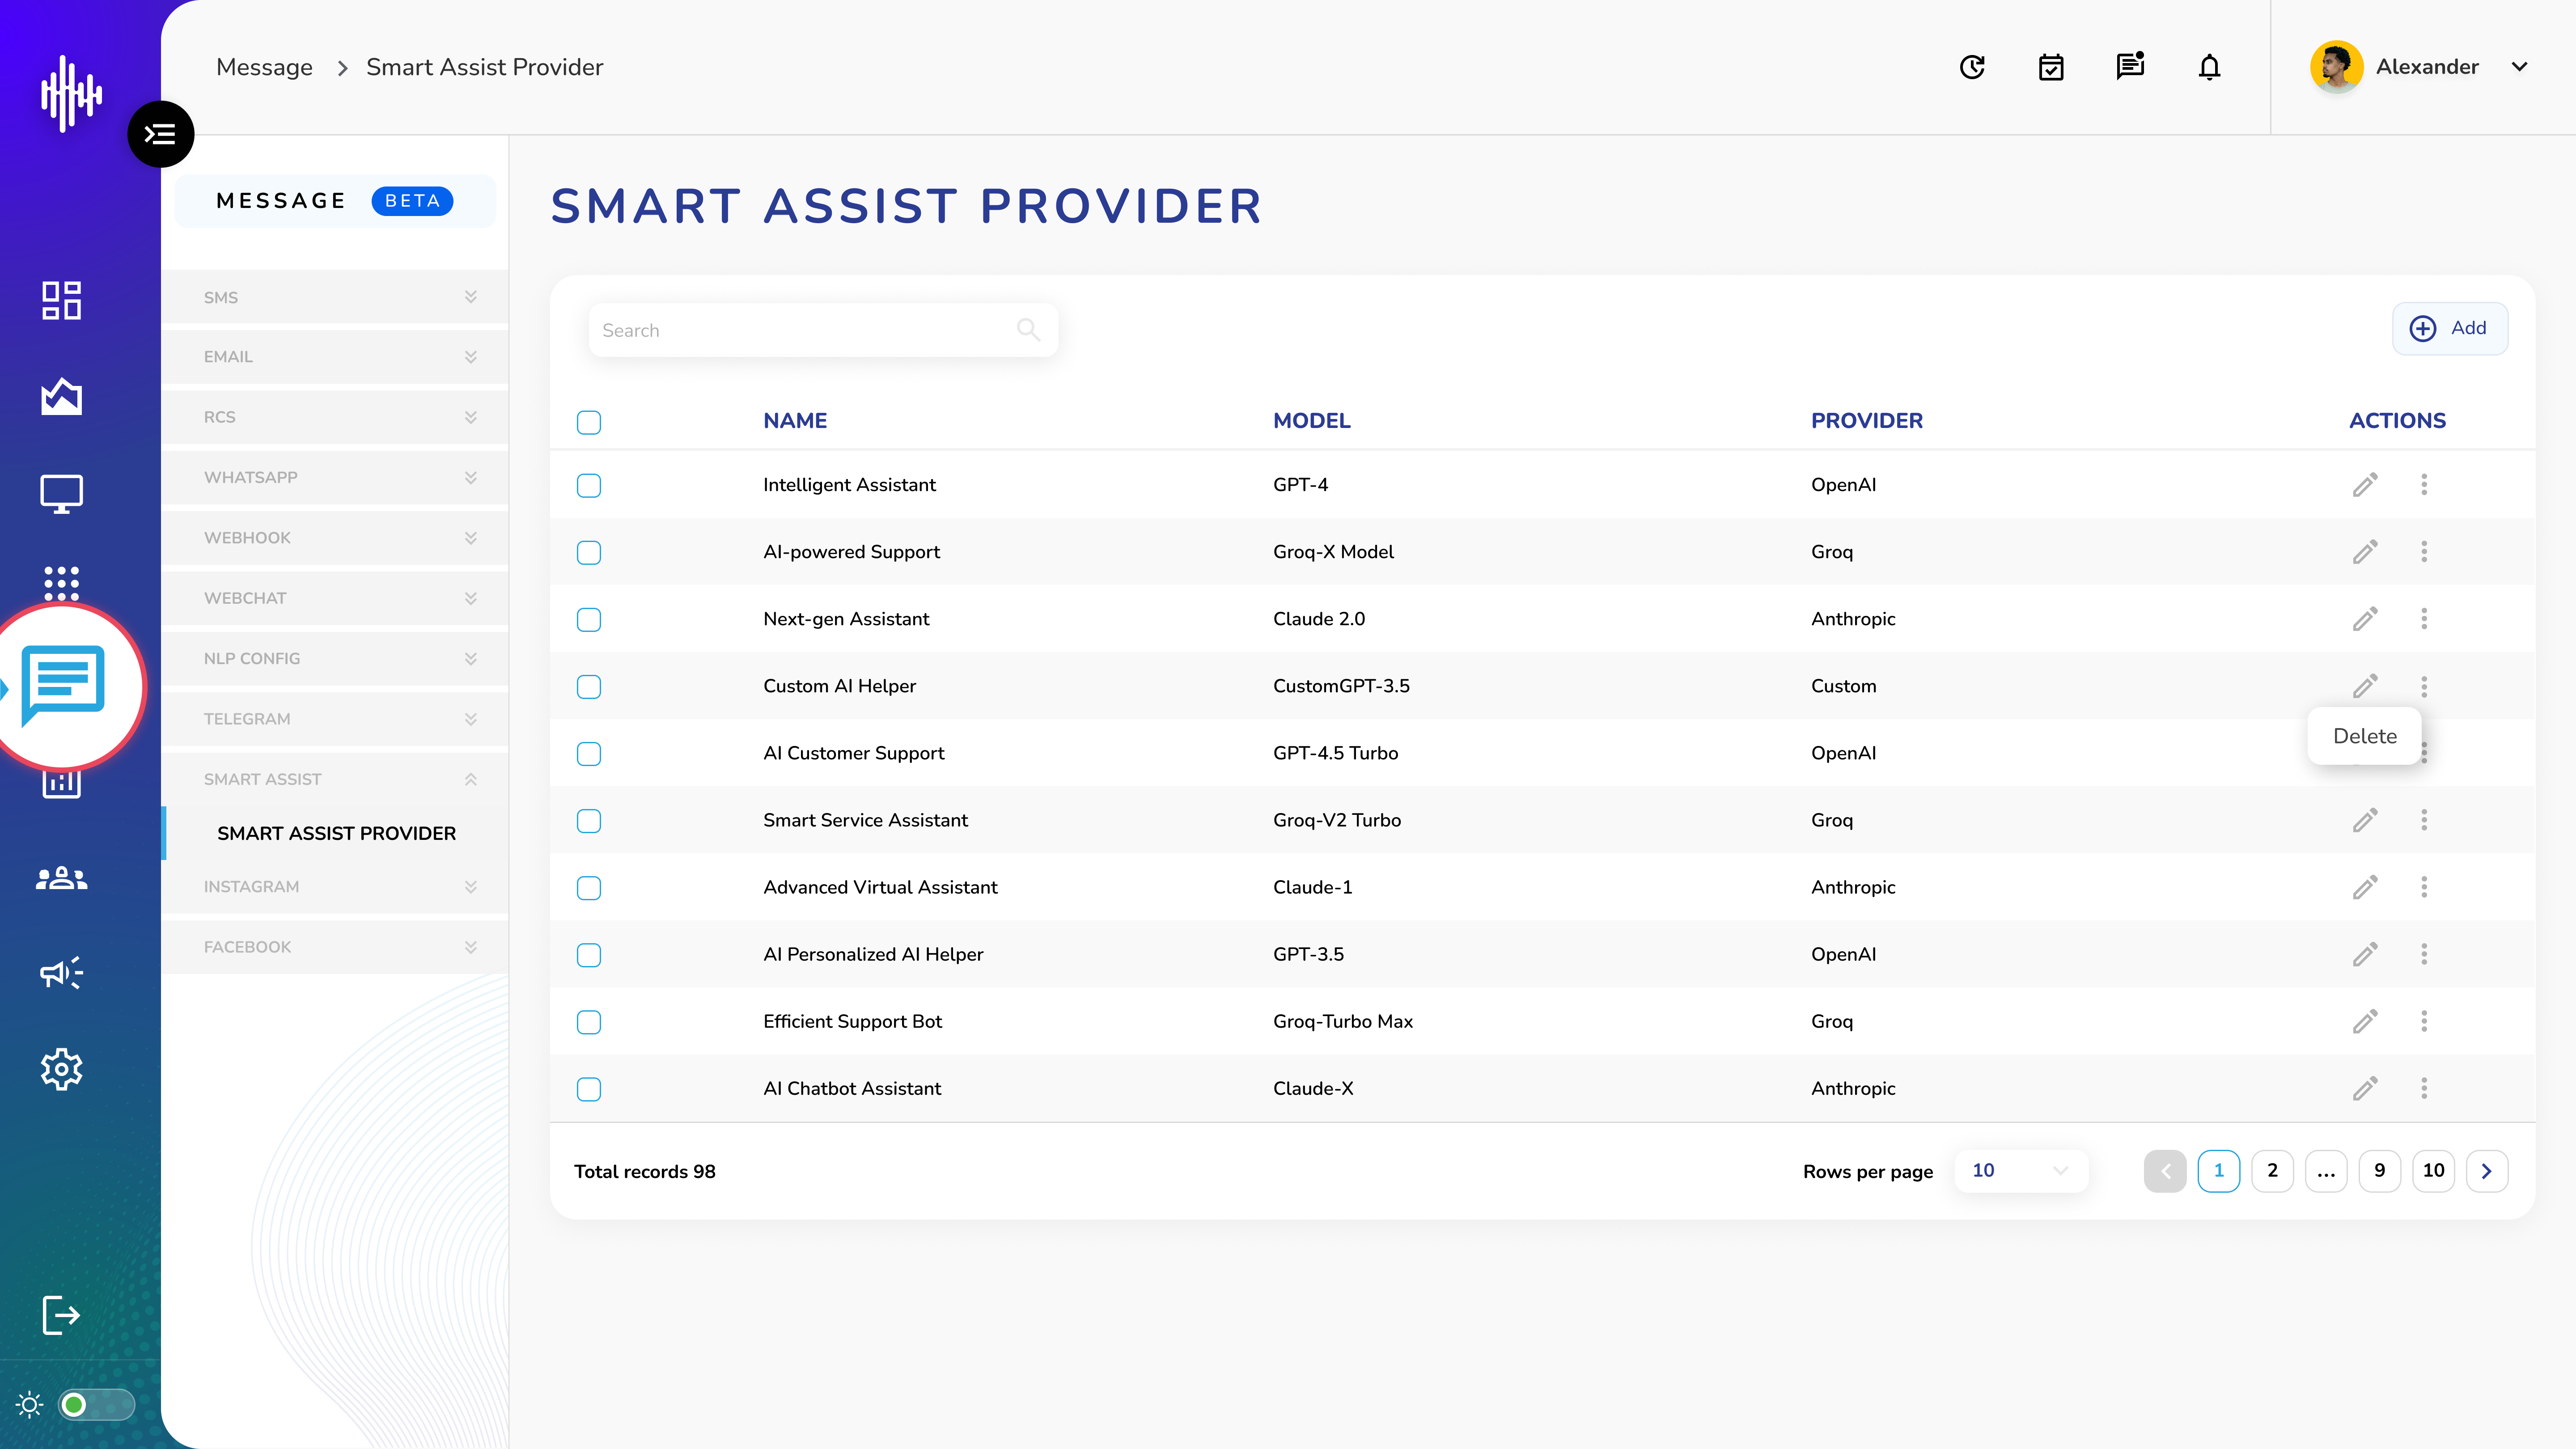
1. Smart Assist Provider Screen Elements
| Column | Description |
|---|---|
| Name | Provider name |
| Model | AI model type |
| Provider | Service provider name |
2. List Features
a. Top Bar
i. Search functionality
ii. "+Add" button for new providers
b. Available Actions
i. Pencil Icon: Edit configuration
ii. Three Dots: View info/Delete provider
3. Navigation
a. Adjustable rows per page
b. Pagination controls
c. Total records shown
Important Notes:
-
Test configurations after changes
-
Regular settings review
-
Document provider settings
Add Smart Assist Provider Guide
Overview
When clicking "+Add" on the Smart Assist Provider screen, a configuration tab menu with two tabs: Model and Functions.
1. Model Tab Configuration
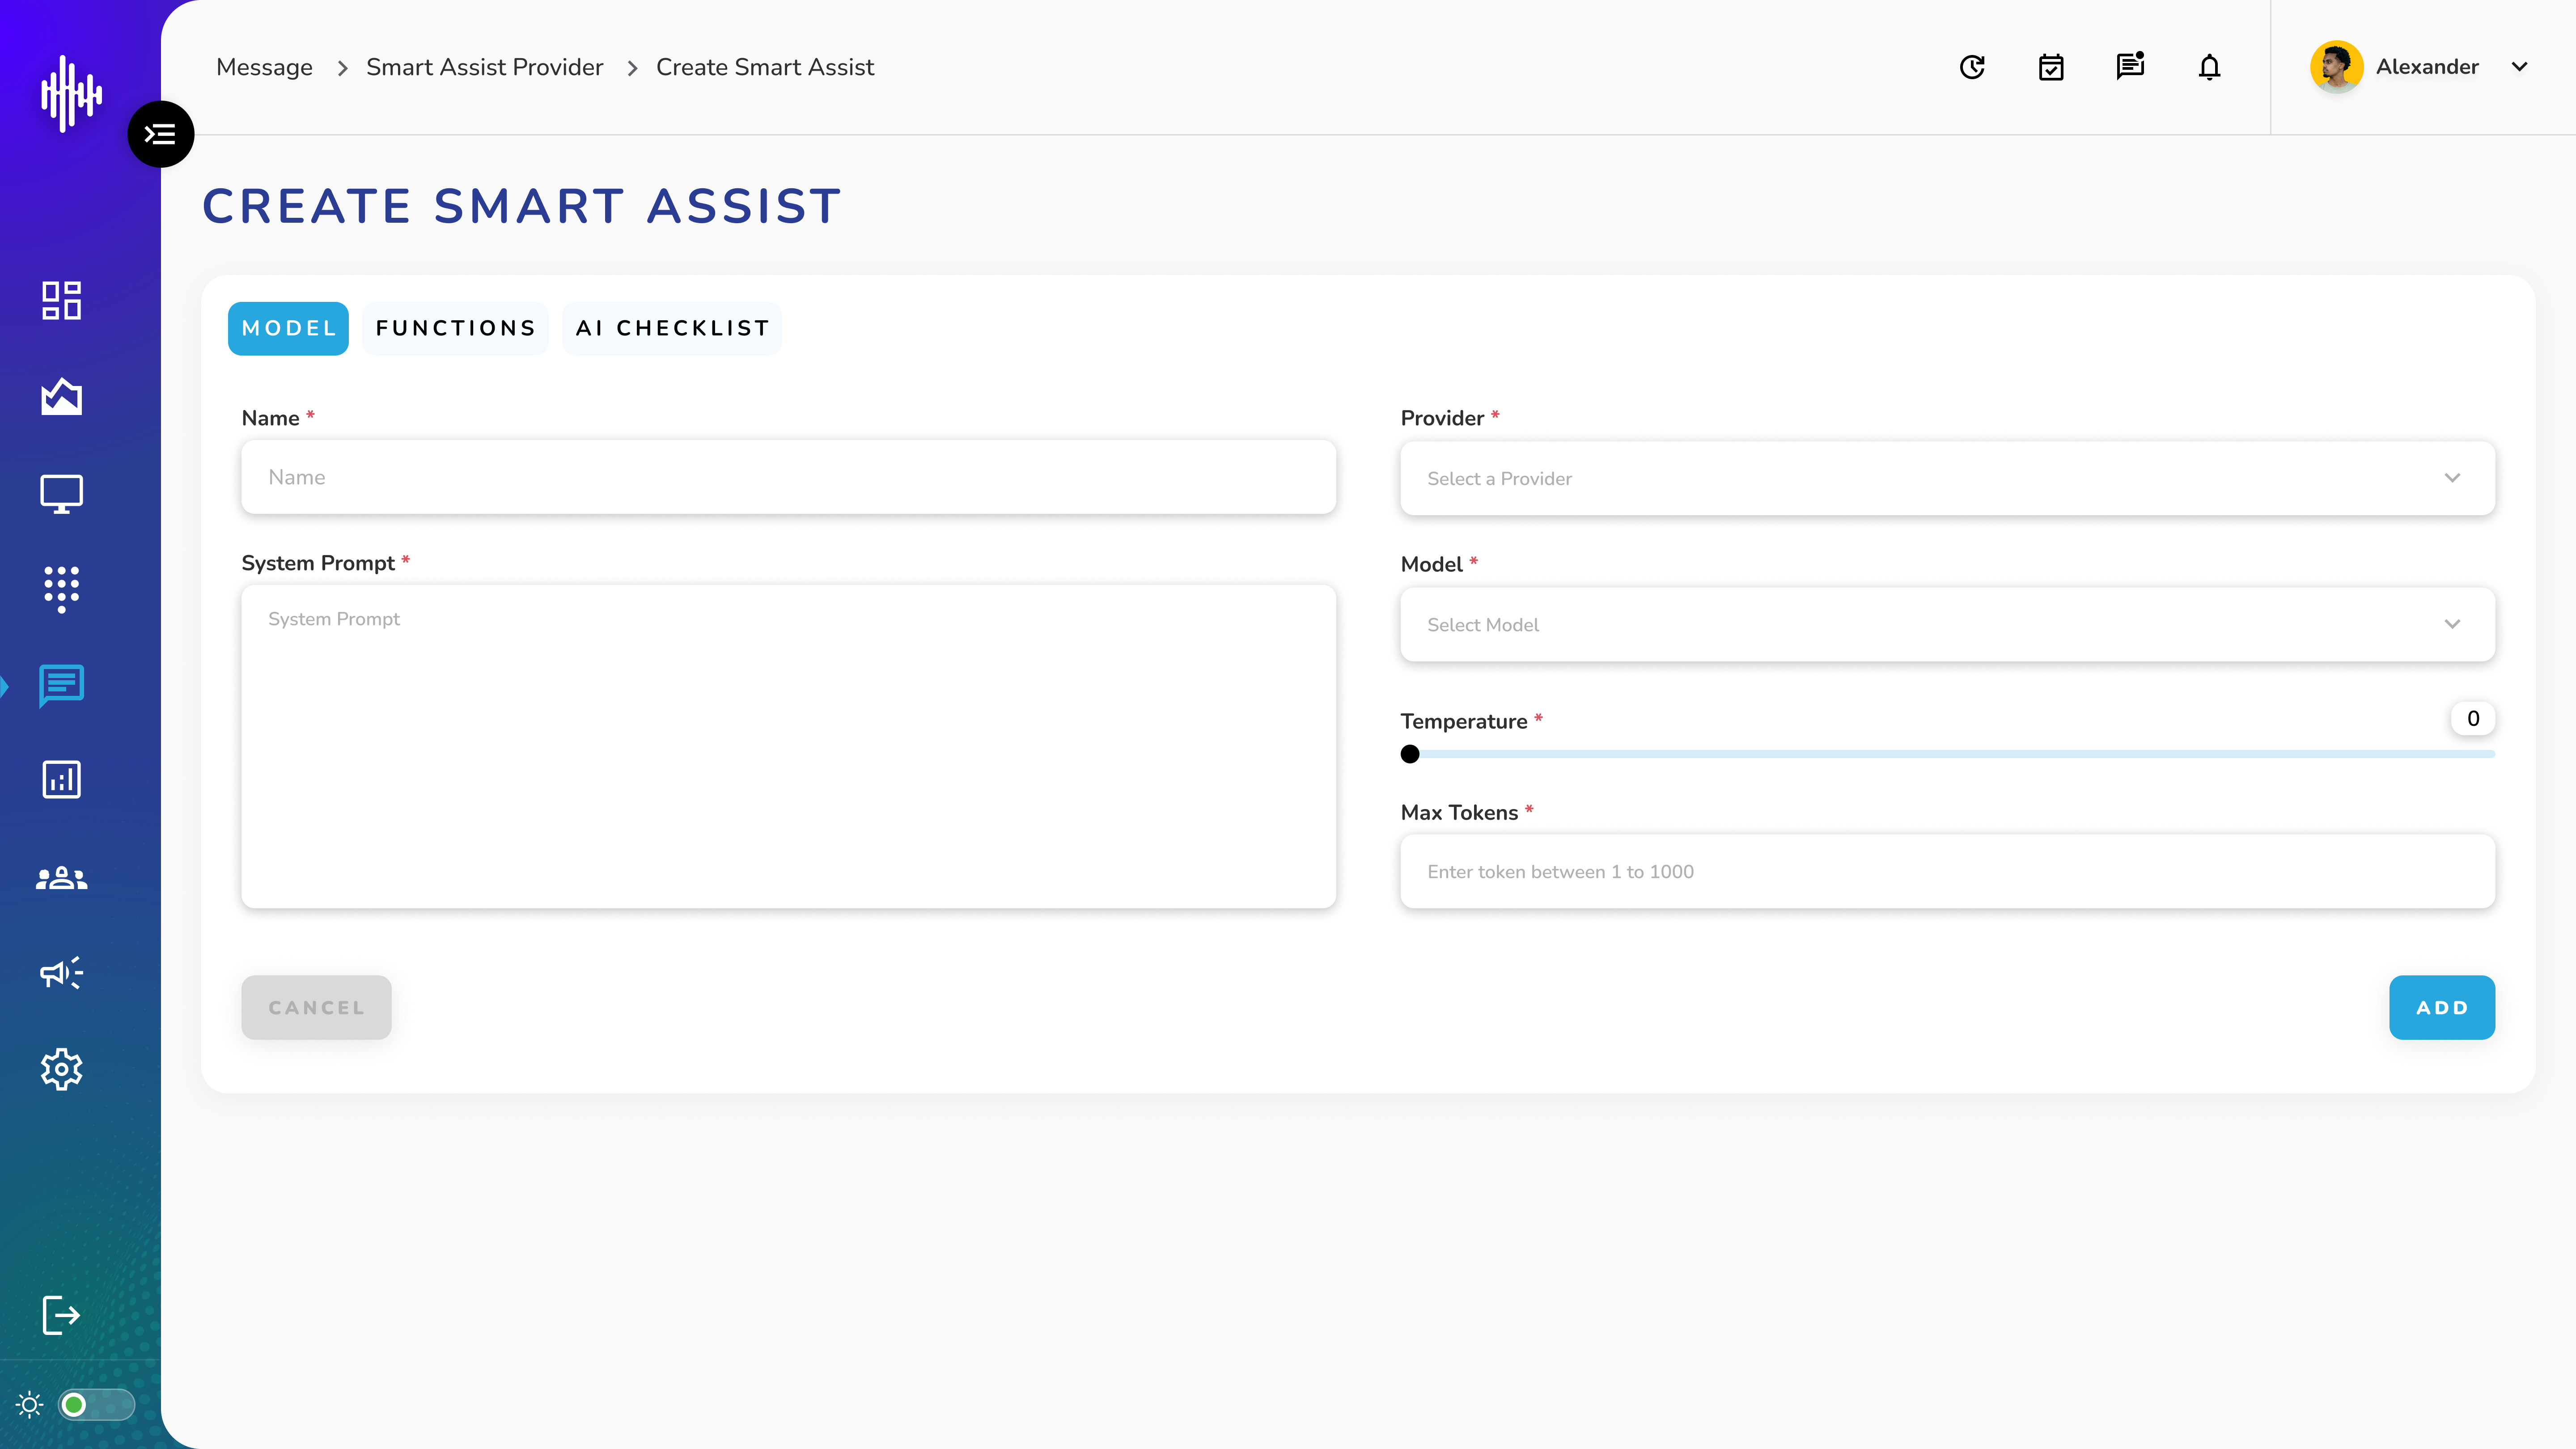
a. Required Fields
| Field | Description | Requirements |
|---|---|---|
| Name | Provider identifier | Unique name |
| Provider | Service provider | Select from dropdown |
| System Prompt | Initial instructions | Clear, specific instructions |
| Model | AI model type | Select appropriate model |
| Temperature | Response creativity | Scale 0-1, default: 0 |
| Max Tokens | Token limit | Range: 1-1000 |
b. Best Practices - Model Tab
a. Set clear, specific system prompts
b. Choose temperature based on need for creativity vs precision
c. Set appropriate token limits for expected responses
d. Test different models for optimal performance
2. Functions Tab Configuration
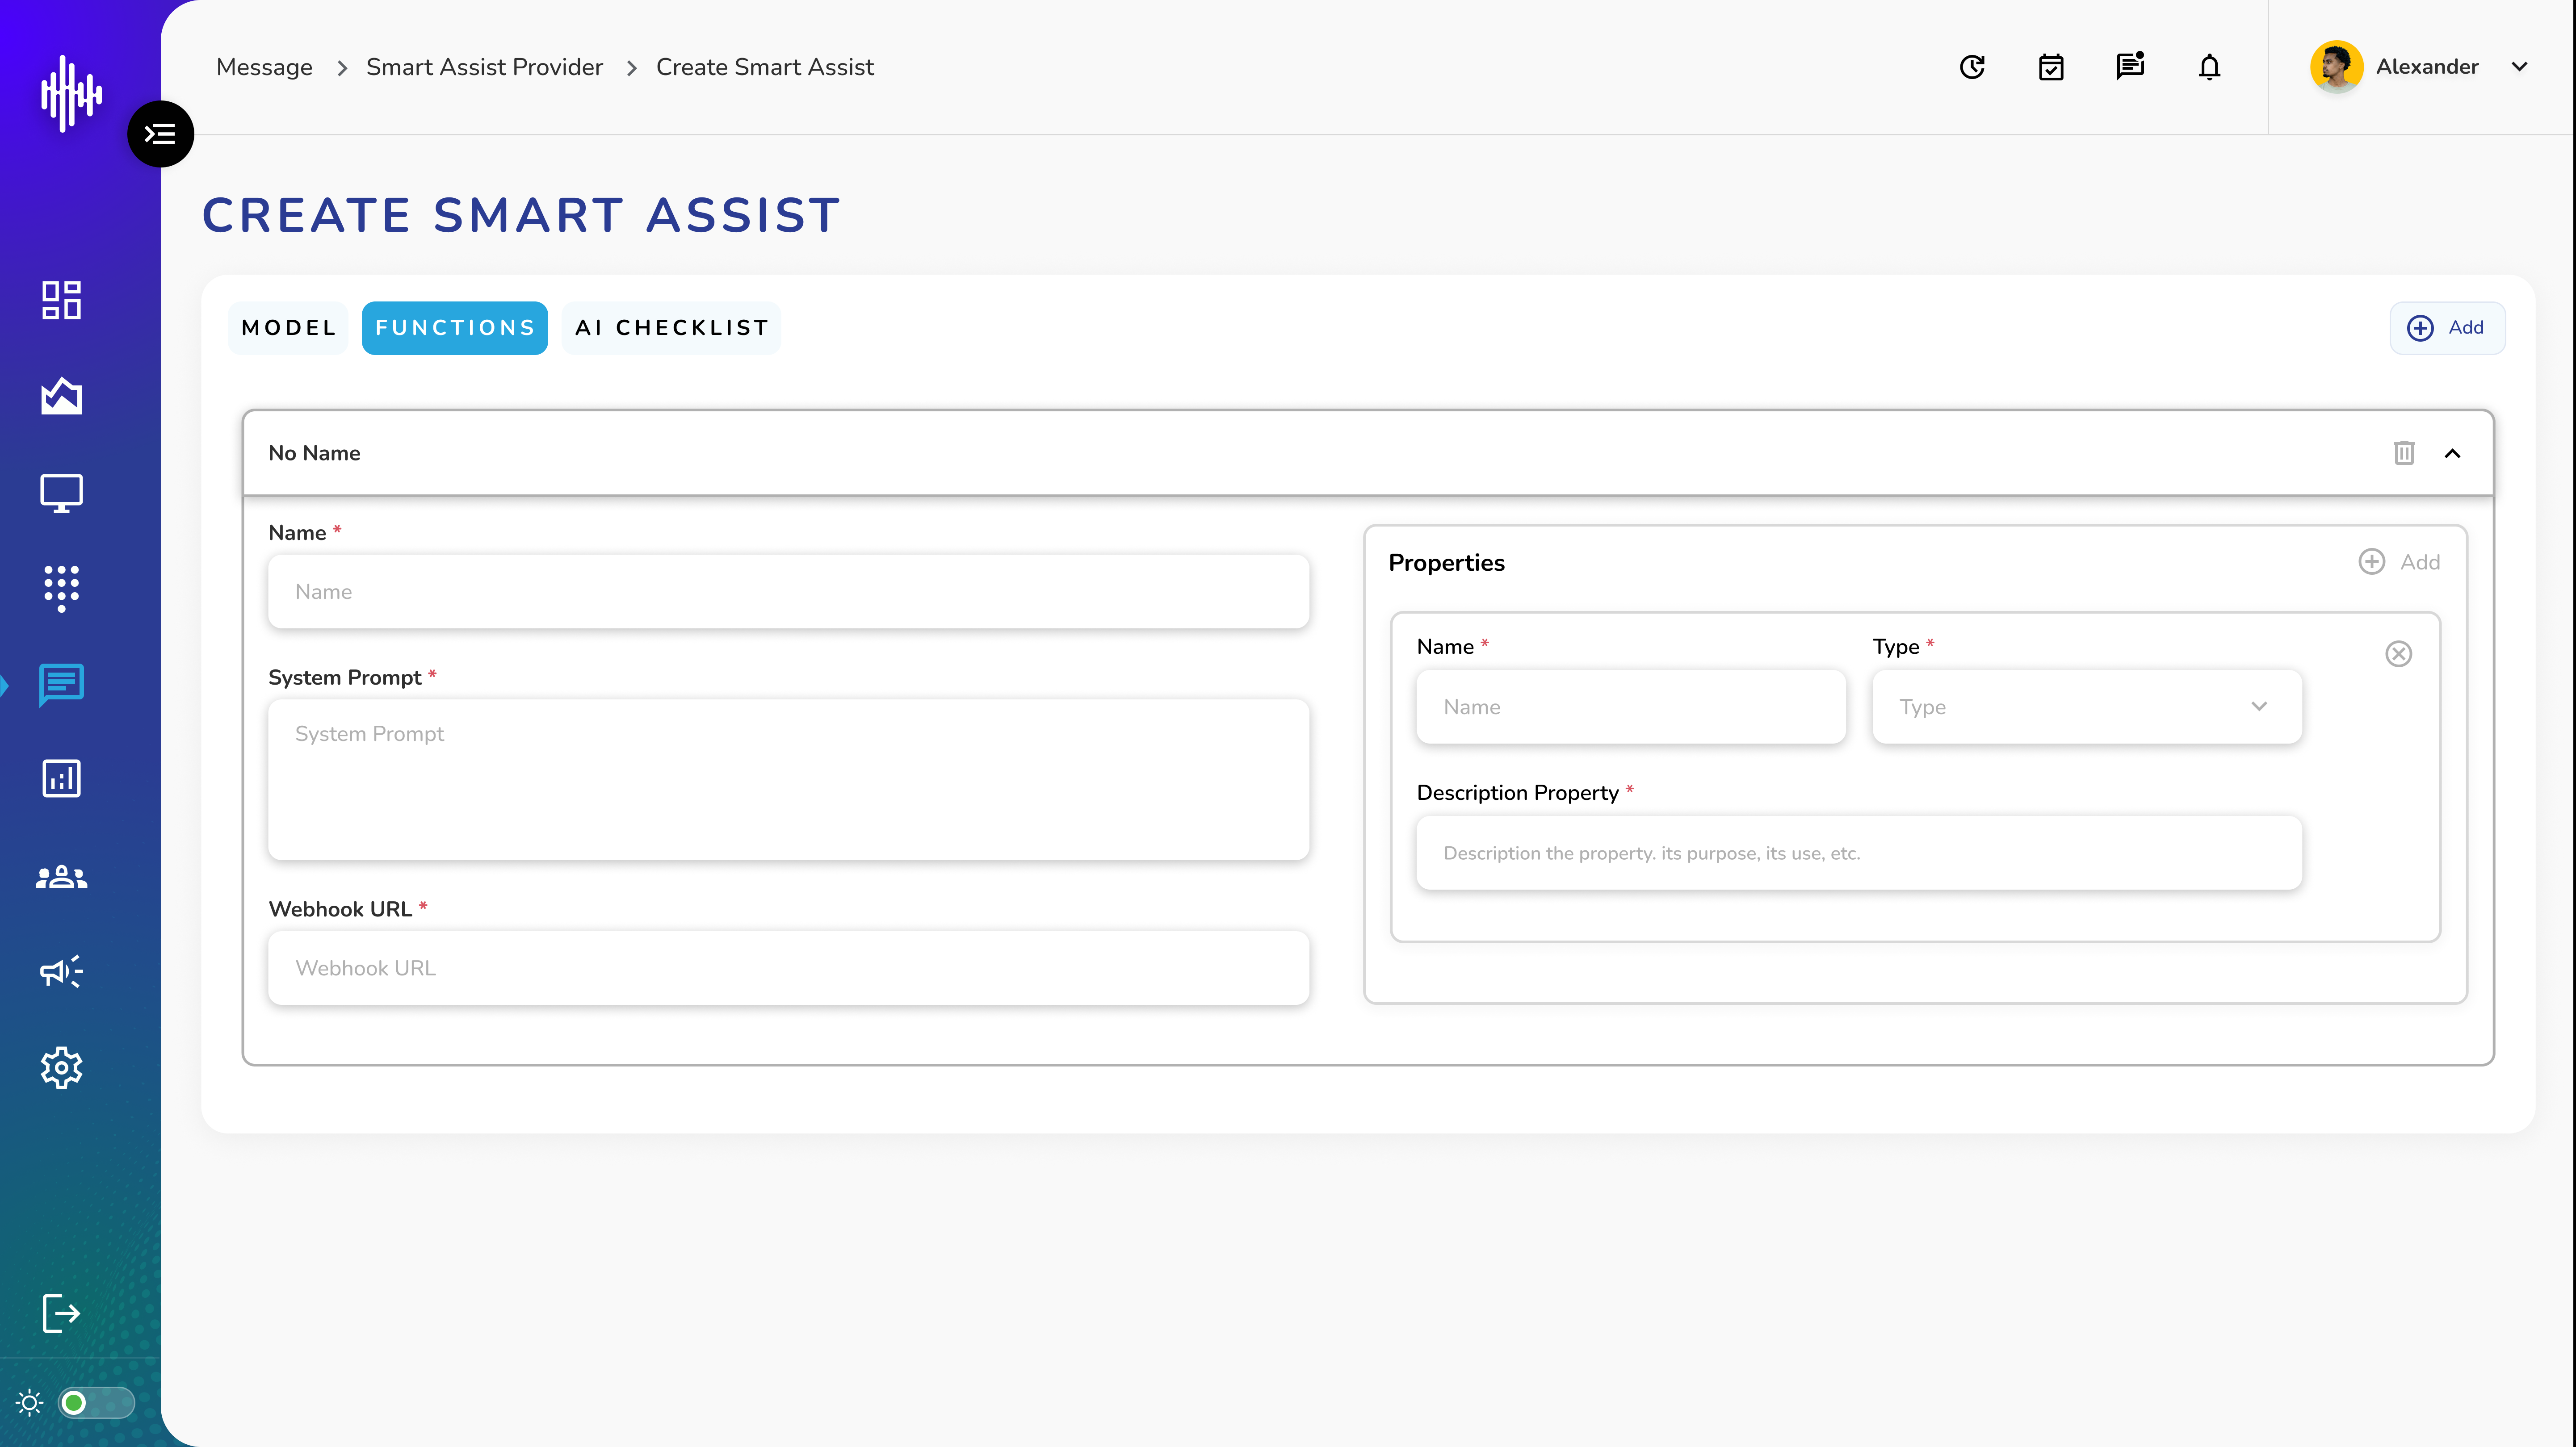
a. Required Fields
| Field | Description | Requirements |
|---|---|---|
| Name | Function identifier | Unique name |
| System Prompt | Function instructions | Specific operation guidelines |
| Webhook URL | API endpoint | Valid, accessible URL |
b. Properties Section
a. Name: Parameter identifier
b. Type: Data type specification
c. Description: Detailed parameter explanation
c. Best Practices - Functions Tab
a. Define clear function parameters
b. Provide detailed property descriptions
c. Ensure webhook URL is accessible
d. Test function endpoints before saving
3. Configuration Steps
a. Click "+Add" on main screen
b. Complete Model tab fields
c. Switch to Functions tab if needed
d. Add necessary properties
e. Test configuration
f. Click ADD to save
Important Notes:
-
All fields marked with * are mandatory
-
Save configurations before testing
-
Verify all URLs and endpoints
-
Document function parameters
-
Regular testing recommended